Saturday, July 30, 2011

Wild& Wacky Science art camp II day 3

What a wild day! We had a guest (my husband George) with tools, lots of old electronics, lots of recyclable bottles and other items and kids. What a combination. We have been collecting items for months for this project so the kids could take things apart and see what was inside of them and what made them work then create a roboto with the parts they generated. We are pretty big on safety when we do this and only had need of 2 bandaids as the glove was on the wrong hand. Thanks to Kristin, the kids librarian for lending us the goggles and safety glasses. Kids got the chance to see how some of the tools worked too as most had not seen or used C-clamps or pry bars. 
We finished off our day making "cooked" puffy paint art. We made our own self-rising mix and added colors with food coloring then painted cardboard squares and popped them into the microwave. Very interesting to watch them puff up.  I found this on an internet search. 


Recipe: 
Place into little cups: 1  teaspoon flour, ½  teaspoon salt, ¼ teaspoon baking powder
 Add 1-2 drops tempra paint or  food coloring to each cup and then add 1 1/2  teaspoons water to make a nice smooth paste- like pb. Dab onto surface thickly or spread with Q-tips, wood sticks or stiff paint brushes. Put into microwave for 30 seconds. 


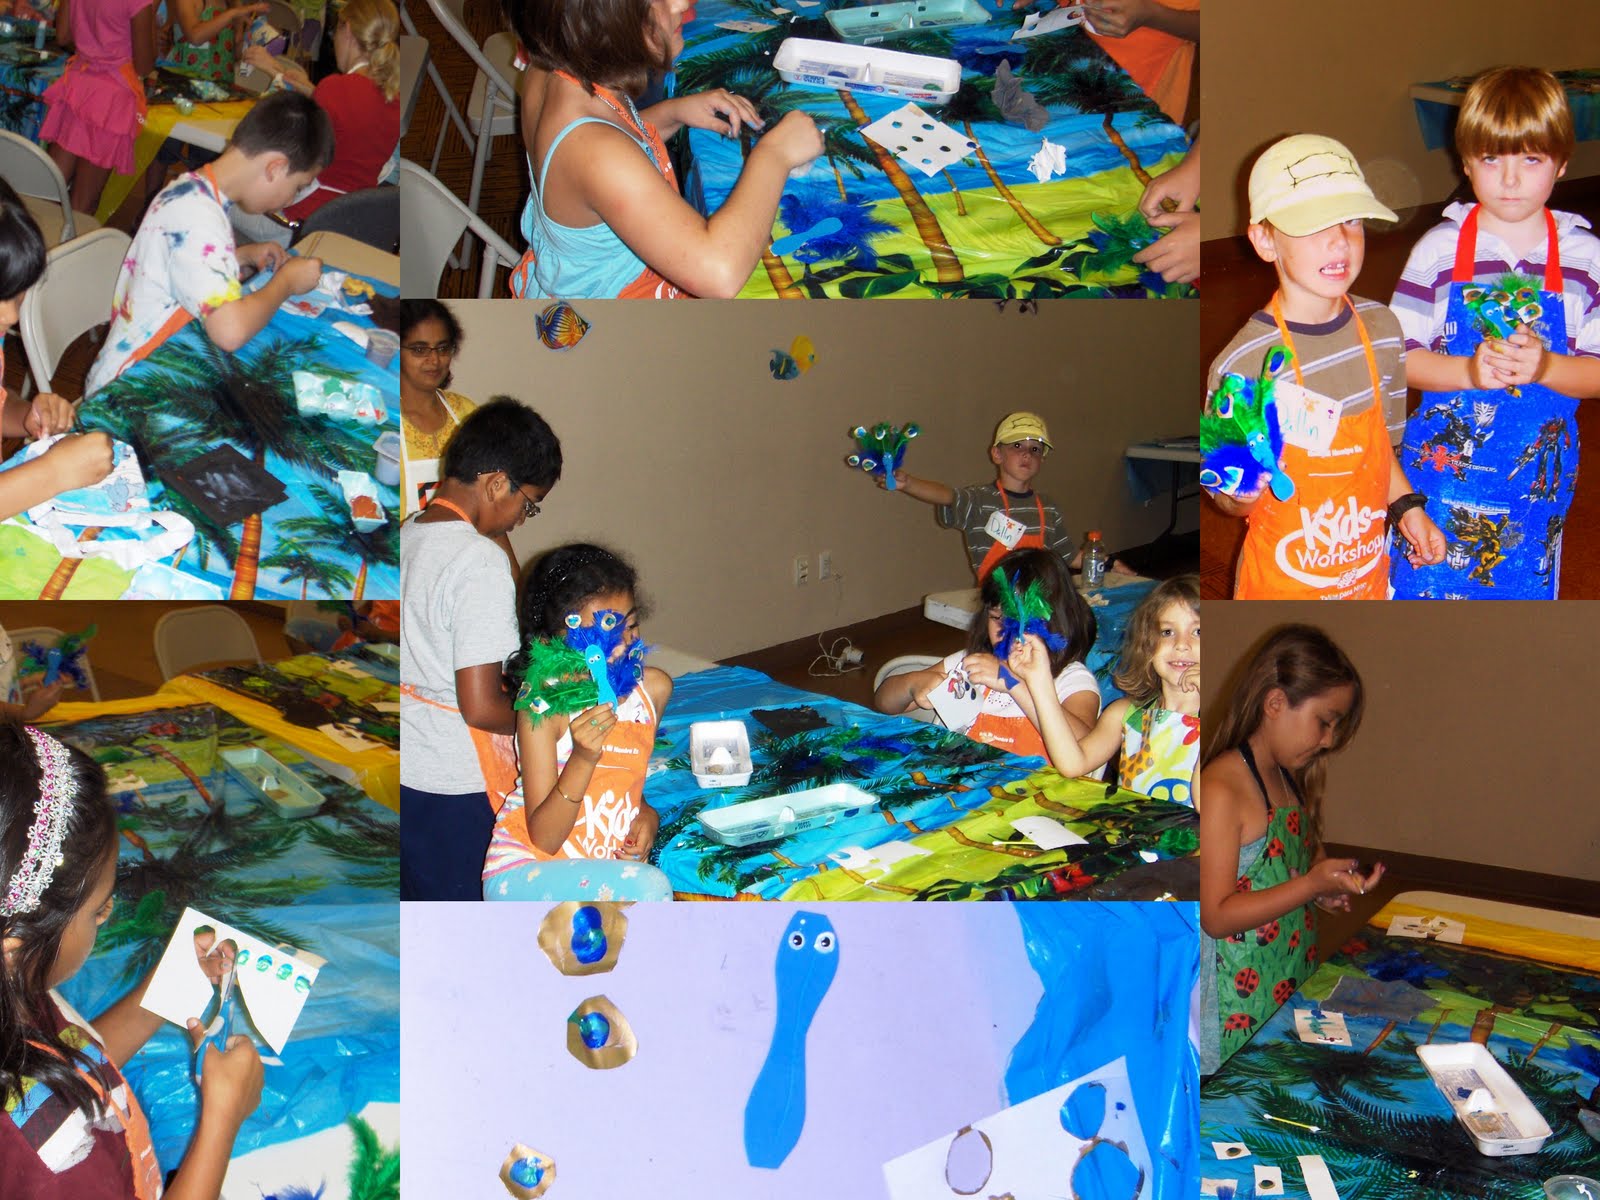
Take a longer look at our day:

Friday, July 29, 2011

Wild&Wacky Science art camp day 2

We started the day using homemade clay and corks to create bugs with chenille stem legs and wings. Some of the kids decided that the corks did not fit with their plans and went on to create bugs of every size and shape. we limited the colors of clay to about 6 but that did not seem to limit the kids at all.


Next we did another splitting color project. We used washable markers and permanent markers on coffee filters to create designs. we then spritzed the filters with water to see which colors spread. The kids then used a dropper and alcohol to see if that would make the other colors spread. A bit of spritzing each other as well but water is probably OK. Our second project was a bit of a flop from an art standpoint--pounded flower prints. The flowers are a bit dry this time of year but the pounding part was a real hit. Some of the group decided that if they stamped on their project that it would squash more of the color from the petals and leaves.
Our final project of the day was a stamping project with a variety of fruits and vegetables and a paint called heavenly hues that gives a bit of a softer effect even on the fabric. They turned out pretty well and the older kids got really creative in how they used them.
Join us for a closer look at our whole day:

Wild&Wacky Science art camp day 1

We kicked off the week with the messiest project yet...our very colorful lava lamps and glitter globes. The group got to figure out which liquid floated on which and how salt and alka seltzer altered the oil/water mix in the lava lamps. They also got to see what different mixing techniques did to the glitter globes. I am so grateful for all the donated newspapers that made cleanup a snap!
We then made and decorated periscopes from CDs and long white boxes. The group had to assemble the mirror sections and install them so they were at the right angle and parallel with each other. One of the group discovered that placing 2 of the periscopes together works pretty well too.
Our last project was one of splitting light and investigating what materials would do this. We used prisms, various glass jewelery, mirrors, an acrylic award, CDs, and water prisms made from a glass dish and a mirror. The kids discovered they could bounce the rainbows all over the room and direct them where they wanted to.
Take a look at our day below:

Thursday, July 28, 2011

Recycled Robotos @ WBCL

One of the most fun programs to do with recycled materials is this one. We have done this a time or two each year and the results are always amazing and creative. We began with 6 boxes of supplies including drink bottles, kleenex boxes, CDs, wrapping paper tubes, foam pieces and bottle lids of all kinds. The instructions are to browse the materials and create a roboto or alien. Great projects one and all. We are doing a variation on this for art camp on Friday.
Posted by Picasa

Thursday, July 21, 2011

Painting T-shirts & more @ Harker Heights Library day 2

We had fun with this one. We used plain old Haynes t-shirts and inked on a design then set the group loose with a variety of fabric paints and the instructions to add an art phrase and their name. Of course several had to add a LOT more and so it went. I also included a shot of our great name tags here from yesterday.

We always spend some time in formal drawing and were able to pull quite a few books from the library to use as a guide (and introduce the group to them for possible check-out.) We did lots of sea life, monsters and aliens to get ready for the remaining projects. The kids jumped right in and soon were asking for more paper and the books for free draw times.
I like to use materials that are a little less traditional for kids to introduce them to the possibilities in art and metallic paint and dark surfaces fall into that category. I really appreciate my friends who helped out with the paints too. We look at around a dozen slides every day to share our tastes in art and examine them but also to supply concrete examples to use in their own paintings. There are so many good ones in this group but the fish and birds turned out especially well.

Click on the slide show below to share our day.

Painting on BIG paper @ Harker Heights Library art camp day 3

This project is always a hit as we give kids much larger surfaces than they ususally get to have and tell them to use any of the brushes and tools they have been introduced to on the subject they pick. We have a large selection of brushes compliments of my painting friends and left-overs from other classes. We also had the pouncers, corks and palette knives to use in addition to forks (to make wavy lines.) Again a number of the painings were inspired by the slide show earlier in the day. Hopefully some of these will turn up in their art show.


We capped off the week with one of my favorite projects--food art--and apparently it was a hit with the kids and the staff as it was hard to get them out of the kitchen. There were no left-over rainbow cupcakes either! To do this project all you need is a box of white cake mix,  food coloring, and several small bowls. Once mixed we divided the batter into 6 bowls, colored it with the coloring--mixing the orange and purple--and spooned it into the baking cups. After it is baked just frost and add a painted rainbow cookie before eating it.  


Thought I'd include a picture of the great staff we had this week to pull this program off. It is always ideal to have lots of help to do the hands-on projects as the kids can get a bit freer in their artwork. Also great when everyone is enjoying being at camp!
Posted by Picasa

Wednesday, July 20, 2011

Paint & Paper @ Harker Heights Library

We took the camp on the road this week and what a great group! We started the week with pastels which to most kids are just chalk until they get the good colors and dark paper. We made name tags to get to know each other then launched into the first "painting" project--glue set pastel beach scene. To do this the kids first draw their picture onto white charcoal paper--it works better as it has a bit more tooth--then either dip the pastel pieces into school glue or paint sections with the glue and rub over them with the pastels. This lets them use several colors to do shading and cover any areas that are not totally gluey with a bit of glue to seal it. Not bad at all!


Next we did a bit of science with our painting and used a few tools to help us out. We used black pastel paper and drew the planets and moons either freehand or using patterns or templates to trace circles and ovals. Then the fun began--the students colored the plantets then we helped them add highlight areas for reflected sun. One of the kids did his really softly which turned out especially nice. Another skill we learned was how to clean up the areas that get smuggy and the set the pictures with hair spray (outside.)


Our last project was to create a dimensional picture using palette knives and texture paste. We also got to use finger pouncers which are very popular. I did the background of greenish blue on squares of foam core board before class then lead them through drawing a leaf from the veins out, painting it with a palette knife and adding the veins back with the edge of the knife. We then added stems for the dandelions and used the pouncers to create the fluffy look. 


Click on the video below to share our camp day.

Saturday, July 16, 2011

Seuss art camp day 3

This was our messiest day by far but lots of fun too. We started with the Lorax story then made a diorama from a milk carton,  straws and feathers, and a wood turning. The kids got to make the Lorax and decorate/color him then make the truffula trees using straws and feathers and mount everything into the box. I was a little concerned that the story and project might be a bit of a stretch for this age group but they were familiar with the story and really got into working with the materials. The kids even made a couple of extra truffula trees for me.

Breaking for a new story between projects has really worked out well. The kids love to be read to and we love reading to them. It sure made set up and change over a breeze. We did oobleck and it is a stunning mess but very fun. We used the cornstarch recipe and except for the sandwich bags being unequal to squishing things went very well. Not many bags went home but we were able to let it drip from our fingers and really get the idea "it is so oobleck." We had the wading pool to wash up in so messy was just fine. 
We ended the day with painted feet and feathered hats. Painting each other's feet with shaving cream paint and making a "foot painting" was not for everyone so some didn't get a painting and some only decided at the very end to do this. The hats were a great success--I'll bet Bartholomew could have used a few of ours in his 500! 
Take a look at the video slide show at the end of this blog.


Booklist for Seuss it up:
 The 500 hats of Bartholomew Cubbins
 Horton hears a Who
 I can read with my eyes shut
 Oh, the places you'll go
 The Lorax
 One fish, two fish, red fish, blue fish
 Yertle the turtle, and other stories
 And to think that I saw it on Mulberry Street
 The butter battle book
 The cat in the hat comes back!
 Did I ever tell you how lucky you are
 Dr. Seuss's Sleep book.
 Fox in socks
 Hooray for Diffendoofer Day!
 My many colored days
 The shape of me and other stuff
 The Sneetches, and other stories
 Thidwick, the big-hearted moose

 The Foot Book

Friday, July 15, 2011

Seuss art camp day 2

The second day of Seuss art camp was phenomenally fun. This group is in love with reading and with Seuss and willing to create. We started with stories and a white lunch bag for our "going home" bag. They drew and colored the bags as they chose using books from the book nook. Some wanted to draw more familiar animals like sand crabs and giraffes or aliens but all the bags turned out great.
Take a look at the video slide show at the end.  
Then came the Yertle the Turtle project. We molded home made salt clay over an ice breaker box (a wonderful donation) then added legs, a head and a tail. I had floral beads for detailing the backs but when we offered small amounts of pink, orange, purple and light green clay the kids when into hyper create mode. What stunning turtles they made. 
A quick break for story rug--Horton hears a who--which seems to be quite a favorite then creating a Horton finger puppet from a tp tube, construction paper, a chenille stem, pompom and a face from the seussville.com website. This turned out pretty good. Some of the kids had a bit of a challenge with the cutting but that is a skill for this age group so we were prepared to help them out. Everyone seems good with the glue sticks and Alene's glue on q-tips. 
Our last project of the day was a quick little dinosaur finger puppet that they colored with pencils and cut out. The dinosaurs were a bit noisy with all the roaring!

Wednesday, July 13, 2011

Making clay sculptures @WBCL

Clay is always so much fun to work with. It just brings out the imagination in a way not many other art products are able to do. I made up 4 colors of the cooked salt/flour clay and gave each participant 4 balls of clay, an OJ lid and a few toothpicks. We had magnet strips available for those who wanted to create a magnet. Some of the sculptures got far too big to hang but the diversity was fun to see from a giraffe with spots to a volcano to flowers to a dragon head. We got kind of an over run of people past our ticket amount but everyone shared some clay to let the extras work on a project too. The recipe for this clay is on the other page.
Posted by Picasa

Monday, July 11, 2011

Making dragon masks @ art camp day 3

We started the day making Draco the dragon boats, a Viking boat from sparkly felt and iridescent paper twist. They had to draw their boat, cut it out and mount it on a wooden oval. They got to pick if they made a pin or a magnet. We had looked at some of the Viking longboats in the museum in Oslo, Norway earlier in the week.  


This turned out to be even more fun that we planned as the kids creativity and playfulness kicked in. Hardest part of the whole project was folding the edge of the bag. I made some templates for eyes and the mustaches but the group was free to do their bags as they wanted. We viewed a number of Chinese dragons and several New Year's dragon dances at the beginning of the day to give them an idea of what is used in traditional settings. We didn't have a lot of time to practice before the dragon dance at the end of the day but they found plenty of time to try the masks on and dance around with them anyway.


We started with a plain paper grocery bag, had a selection of colored paper and construction paper, tissue streamers, dividers from some kind of grocery item to use for horns, and a few chenille stems. Toward the end of this slide show is the video showing one of the bags in motion.

Friday, July 8, 2011

Painted dragon T's and pencil toppers @ art camp

This might have been a stretch but it sure turned out great. I got black t-shirts and made a dragon stencil to start the shirts. I used so-soft paint and stamped the body onto everyone's shirt so they would have a big reptilian dragon to start painting. We used a combination of so-soft fabric paints and metallic paints to create the shirts. They were able to use finger pouncers to add dimension and to block in the wings. We even had a few 2 headed dragons and a request for a 7 headed one. (NOT)
We double dipped the stories today with Ms. Hall doing 3 at the beginning of the day and Councellor Keighla doing a couple at the end before their drawing time.
I found a cute dragon on the internet to use--a pencil topper that worked out very well. We sure had fun making them. I'll want to use all my special pencils from now on
Posted by Picasa

Thursday, July 7, 2011

Creating an accordion Chinese dragon @WBCL

This was a great project for almost all ages and got lots of family interaction going. I printed the design on white cardstock paper to give it more body when glued.
First the group colored the dragon head and tail with colored pencils. They could have used markers but we rarely use the pencils so it is a good change. I cut colored cardstock in 1/4s lengthwise to make the accordion body. We then cut out the head and tail. Everyone folded their bodies then glued them to the head and tail pieces to make a 2 sided dragon. Last we taped on sticks front and back so the dragon could dance. Take a look at one in motion: 


 I found this project on the Crafts Jr site.  http://www.craftjr.com/dragon-paper-craft/ Thanks to them for posting it.
Posted by Picasa

Dragon week @ art mini-camp starts with origami, clay sculpting

We started the day looking at a bit of history about dragons and looked at a Viking boat in an Oslo museum. We also talked a bit about the difference between Chinese dragons and medieval ones. Then on to the projects. 


First the origami dragon then one molded in sculpy clay.
It was a complex design for some, easy for others but everyone folded a dragon in the end with a bit of help. The excited faces as the wings and head appeared and squeals of delight replaced the "I can't make it do that" and "it's too hard" comments. We are lucky to have a talented teen to lead the origami part of the camp and keep everyone folding.

To make the sculpy clay dragons we started with aluminum foil to make the base. This gives it a lot less weight to bake and lets the campers focus on the features of the dragon. I got several sparkly blocks which was good and bad. They look wonderful but are very much stiffer. Some of the campers refused to knead the clay when it was stiff and just stuck on the firmer blockier pieces. Not bad effect sometimes but it did not stick as well. There were all kinds of designs created from super cute to a realistic serpent. We  used glass beads for eyes so we would not melt them during the baking. Some of the dragons will get a bit of paint on Thursday when the campers paint their T-shirts.
Posted by Picasa

Sunday, July 3, 2011

Peacocks, pelicans, and fantasy birds @ fins & feathers art camp day 3

The title says it all. We did birds today. I got bottle holders from OTC and turned everyone loose with paints and glitter to complete them. The campers were instructed to use very little water so that the colors would not run on the canvas bags. They did a great job on these. Now if I could just remember to get their names on the projects first.


Our second project I found on the internet and will definately do a couple more times with variations. We made finger print peacocks. Kat created the bodies and cut them before class. the campers created the peacock "eyes" by finger painting 3 metallic colors of paint onto paper and cutting them out. They assembled a fan of feathers between the body and a crafts stick, added the "eyes" to the feathers then put on wiggle eyes and beaks. We looked at a number of peacock paintings and pictures at the beginning of the day to prepare. 
Our last project was to create a fantasy bird using their imagination and the supplies on the tables. We had styrofoam eggs and balls, chenille stems, pom poms, wiggle eyes, and feathers of various sizes and colors. The project was placed on the end of a pencil and again the variety in the end was great. 
Posted by Picasa

Friday, July 1, 2011

Fins & Feathers art mini-camp day 2

In the end there were sharks circling. The campers finished their hammerhead sharks and many of the younger ones were observed circing the open spaces. We spent most of our time focusing on the undersea aspects with Ms. Hall telling a couple of fish stories then our sharks and berry box aquariums. Both of these were recycled art projects. The sharks use paper towel tubes and metallic tissue paper that was donated. 


The styrofoam for the aquarium is a bit of a mess to cut but it works really well for a base in the boxes. These are the 1 lb size that everyone got strawberries in this spring. We used chenille stems and fun foam sheets and shapes to complete the undersea worlds.


Our last project was supposed to be eagles and hawks but we turned into fabulous colorful birds and were happy for it. Take a look at our 2nd day of camp.
Posted by Picasa

Fins & Feathers art camp includes Audubon's flamingo, sharks day 1

The week started with a 2 part project. First we discussed John Audubon and viewed some of his prints then using the Picturing America print from the library we drew a flamingo standing on a rock onto watercolor paper. The campers then learned to use various watercolor techniques to complete the picture.
The results were remarkably good. Take a look at the video of the day.

Next we began our shark models. We selected the hammerhead as they are found in Texas waters and more interesting to create. The proved to be a challenge with many fins and parts but in the end they were a great project.

One of the elements we stress at camp is resource books available in the library and using time between projects to read them. The campers have created a reading "cave" under the supply table.
Book list for this week
1. All new crafts for Earth day
2. Amazing beaks
3. Beaks
4. The book of North American owls
5. Bright, lively, and loud
6. Face to face with sharks
7. Meet the peacock
8. My first fish
9. Night science for kids: exploring the world after dark
10. Ocean detectives: solving the mysteries of the sea
11. Ostriches and other flightless birds
12. Owl in the office
13. The peacock's pride
14. Seashore
15. What is a bird
16. Writings and drawings
17. Sharks
18. Super simple origami
19. Surprising sharks

AD