Showing posts with label birds. Show all posts
Showing posts with label birds. Show all posts
Wednesday, March 9, 2016
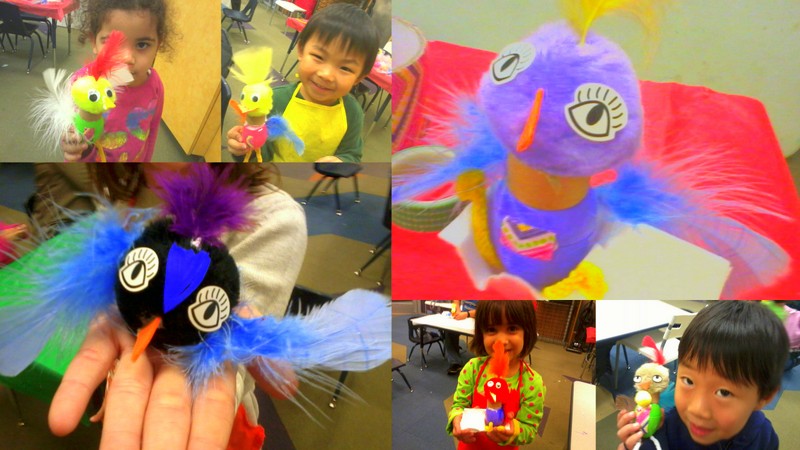
Making Crazy birds @WBCL
Thursday, June 12, 2014
Painting and drawing birds at the WB Annex mini-art camp

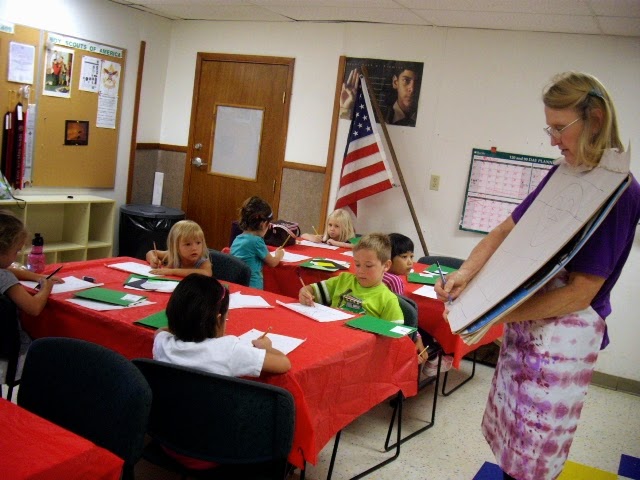 It was a fantastic first day of art camp! We are using a grid drawing method this year and it is really paying off in helping with shape and proportion on a more difficult theme--birds. We talked about local birds naming the ones that we were familiar with and the ones we had seen. kids are willing to try anything and we did.
 We hit on some bird facts: hawks fly 120 mph when diving. The younger kids read a couple of books and created all kinds of owl projects in the morning. the older kids learned quilling and created an owl on an index card. Once they got the hang of it many added branches and other details. Lots of broken sticks for some of them. The final project was a watercolor of the teal winged duck supplied by our local birding group. Not everyone liked my streaky feathers and many smoothed theirs then added water and sky to them. They all got the beautiful teal and blue wing in.

 Day 2 was more painting--painted birdhouses and the teal wing water color for the beginners, a hummingbird for the Jr group. The younger group created an edible nest with eggs (way too sweet we decided) and little pompom birds for their birdhouses. The older group investigated peacocks and the did a pastel drawing on black background of a peacock. They decided it looked far better on black than the one I did with another group on white paper. They also got
 to make their dodo birds or a bird of a different sort.
Resource books for the week from WBCL:
Baby Bird's first nest
The book of North American owls
Eagles
Eyewitness Books: Eagle & birds of prey
Hawks
Meet the peacock
Thunder birds: nature's flying predators
Duckling days
Fine feathered friends
Hooray for Diffendoofer Day!
If I never forever endeavor
Feathers and fools
Fly by night
Photos at: drawing birds 14 Jr day 1 & drawing birds 14 beginners day 1
Painting drawing birds JR day 2 painting drawing birds beg day 2
Thursday, January 30, 2014
Drawing and painting winter birds @WBCL


This was a draw along with me lesson (see drawing above) which worked very well last night. I get some fairly young kids in the class and have been doing more draw/paint sessions of late. They love it and they are pretty good at it. The parents do help with the drawings as needed but the kids hold their own. We also had colored reference pictures to consult when we painted the birds. I chose cardinals and jays because they have similar shapes but dramatically different colors. we even did a bit of color mixing and added a few details like sky or branches to them.
Friday, March 15, 2013
All about birds art mini camp day 3


We also covered our surface for the scratch out using either crayons or dark-colored oil pastels. To complete the project they scratched out what looked like twigs for the nest all around the outside and then used a palette knife to scrape out 3 to 5 eggs inside the nest. They then colored the eggs with blue or pink pastel.
At every point the campers wanted to get back and finish painting their birdhouses. The idea of letting them air dry if there was a hair dryer available was not an acceptable option.
The two remaining projects were first to create a nesting materials bag from the mesh vegetable bags that I've been collecting filled with short pieces of yarn and string. Each end was secured with twist ties so it can be refill and attached a pipe cleaner on the end so it could be hung out for the birds.
 The final project was to create birdseed reefs or bird food wreaths for the students to hang out in their yards at home. For this we again follow the directions I used to create these in January. I found this on Pinterest and it worked out quite well. This time we used fluted yogurt cups as our container. I had lots of help mixing up the ingredients much like a science project and then the students helped each other fill their cups, pressed the mixture in tightly, and made a hole using a pencil so that it could be hung on a ribbon.
Lastly they removed all of the items from their three ring binder and transfer them to the gray folder that they had decorated during the week. We punched extra holes along the edges so that they could hang the bookmark from Jeanette Johnson and other items like the nest bag and note bird. When we do this again we will definitely include constructing a pocket on both the inside front and back of the folder so that loose items can be more easily secured.
bird camp day 3
Book list for the week:
1. Charming Handmade Clay crafts
2. Creative Stamping in Polymer Clay
3. Draw 50 birds
4. Essential origami
5. Hummingbirds: hovering in nature
6. Making books that fly, fold, wrap, hide, pop up, twist, and turn:
books for
7. Paper Quilling for the First Time
8. Quilling for Scrapbooks & Cards
1. Backyard birds of Texas: how to identify and attract the top 25 birds
2. The birds of Texas
3. The book of North American owls
4. Hawks
5. Pink!
Thursday, March 14, 2013
All about birds mini-art camp day 2

It was another day of day of nonstop drawing and creating. We discussed the various waterfowl in our parking in Texas, view photos of them on the Cornell site, then drew several of the waterfowl. The drawings of the heron, and egrets, and mallards were fantastic. They learned to transfer their drawings onto watercolor paper then did a watercolor painting of their mallards.

 We also created songbirds from sheets of sheet music and mounted them on clothespins so they would be "note birds." During our last project of the day students elected several methods of completing their Firebird or Phoenix. Some chose to use watercolor, others opted for colored pencils or oil pastels. We took a brief walk out to the courtyard to see if we could identify any birds in our area then came back in and did a sketch of the ones we found.
click on the link to see more pictures of the day at camp: bird camp day 2
Tuesday, March 12, 2013
All about birds Day 1

 We then broke into a craft that was new for all of them. We talked a little bit about quilling and what it has been used for then began pieces to quill a card. We used the cut toothpicks as our quilling devices which worked pretty well. We did palm trees in green with a simple trunk then a pink flamingo. They learned how to shape the body, make legs and beaks, and shape a neck to put the whole thing together. Some went on to add suns, stars and other embellishments. It looks so hard and elegant.
 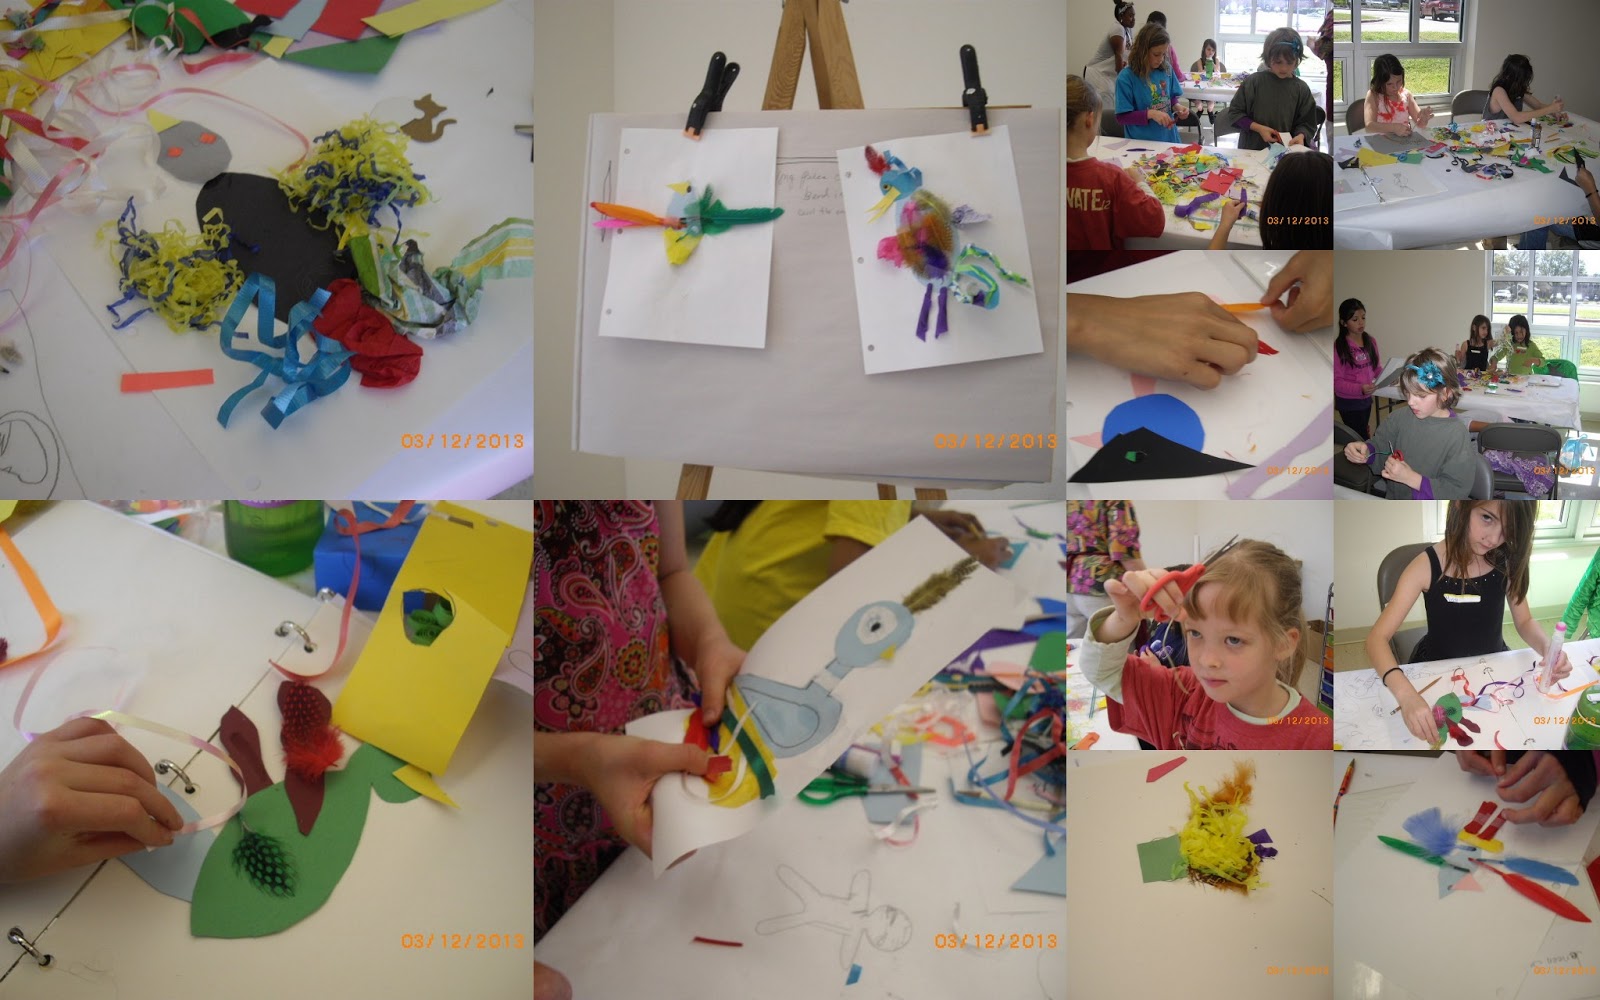 Last project was a multi-layer paper bird. Angel and Kat made samples on this one but the kids didn't need leading on this. They were supposed to make a big bird and they did. They used colored paper scraps, shred, tissue paper, streamers, ribbons and feathers in all kinds of combinations. We even had 5 minutes to clean up and get ready for parents. For lots of pictueres take a look: Day 1 picx
For a look at summer schedule go to my website.
Thursday, January 10, 2013
Making birdseed hangers @WBCL

We've made a variety of birdfeeders over the last couple of years but this one is my new favorite. I found the directions on Pinterest ( http://www.hometalk.com/687521/bird-seed-wreath/photo/140450 )and did it like a science experiment with the kids counting off the ingredients as they went into the bowl. We made them up in antique cookie pans and large open cookie cutters. It was easy to make the holes with straws. They were supposed to let them dry over night and put the ribbons in but no one wanted to wait and most did great. A couple had to be patted together again. No hungry birds in our neighborhood this month!

Saturday, July 14, 2012
Fun with Dr. Seuss @art mini camp


Doesn't everyone love Dr. Seuss? It has been fun to work with some of his lesser known stories and create the projects based on these. We started with reading "The 500 hats of Bartholomew Cubbins" then made folded hats decorated with our own feathers made from paper shred. The kids really had a good time with the book and getting into character wearing the hats.
We read "Wish for a Fish: All About Sea Creatures" one of the Seuss learning library books and made our own aquariums. I had planned on using " McElligot's pond" but it is really long and was good to have as a resource instead. The kids drew fish, plants and other sealife then mounted them in a clear blue tub.

"I had trouble getting to Solla Sollew". Time was flying trying to fit it all in.


Friday, January 6, 2012
Making birdfeeders for National Bird day @WBCL

In the past we have made bird feeders from pine cones but they are in short supply and do not require any creativity or crafting skills to create. The birds do like them though. I found this pattern on the internet at Family Fun and decided to try it instead, especially since it uses recyclable materials. We altered it a bit to use up some sticky backed fun foam instead of crafts sticks and decorated with leftover stickers. Our handle is a chenille stem left from the holidays. Everyone got a baggie of seeds to add when they got home. Thanks to to librarian Jeanette Larson for her page of links and coloring pages. http://www.jeanettelarson.com/Resources.htm I especially appreciated the link to the National Geographic site for bird identification: http://animals.nationalgeographic.com/animals/birding/backyard-bird-identifier/
Sunday, July 3, 2011
Peacocks, pelicans, and fantasy birds @ fins & feathers art camp day 3
 The title says it all. We did birds today. I got bottle holders from OTC and turned everyone loose with paints and glitter to complete them. The campers were instructed to use very little water so that the colors would not run on the canvas bags. They did a great job on these. Now if I could just remember to get their names on the projects first.
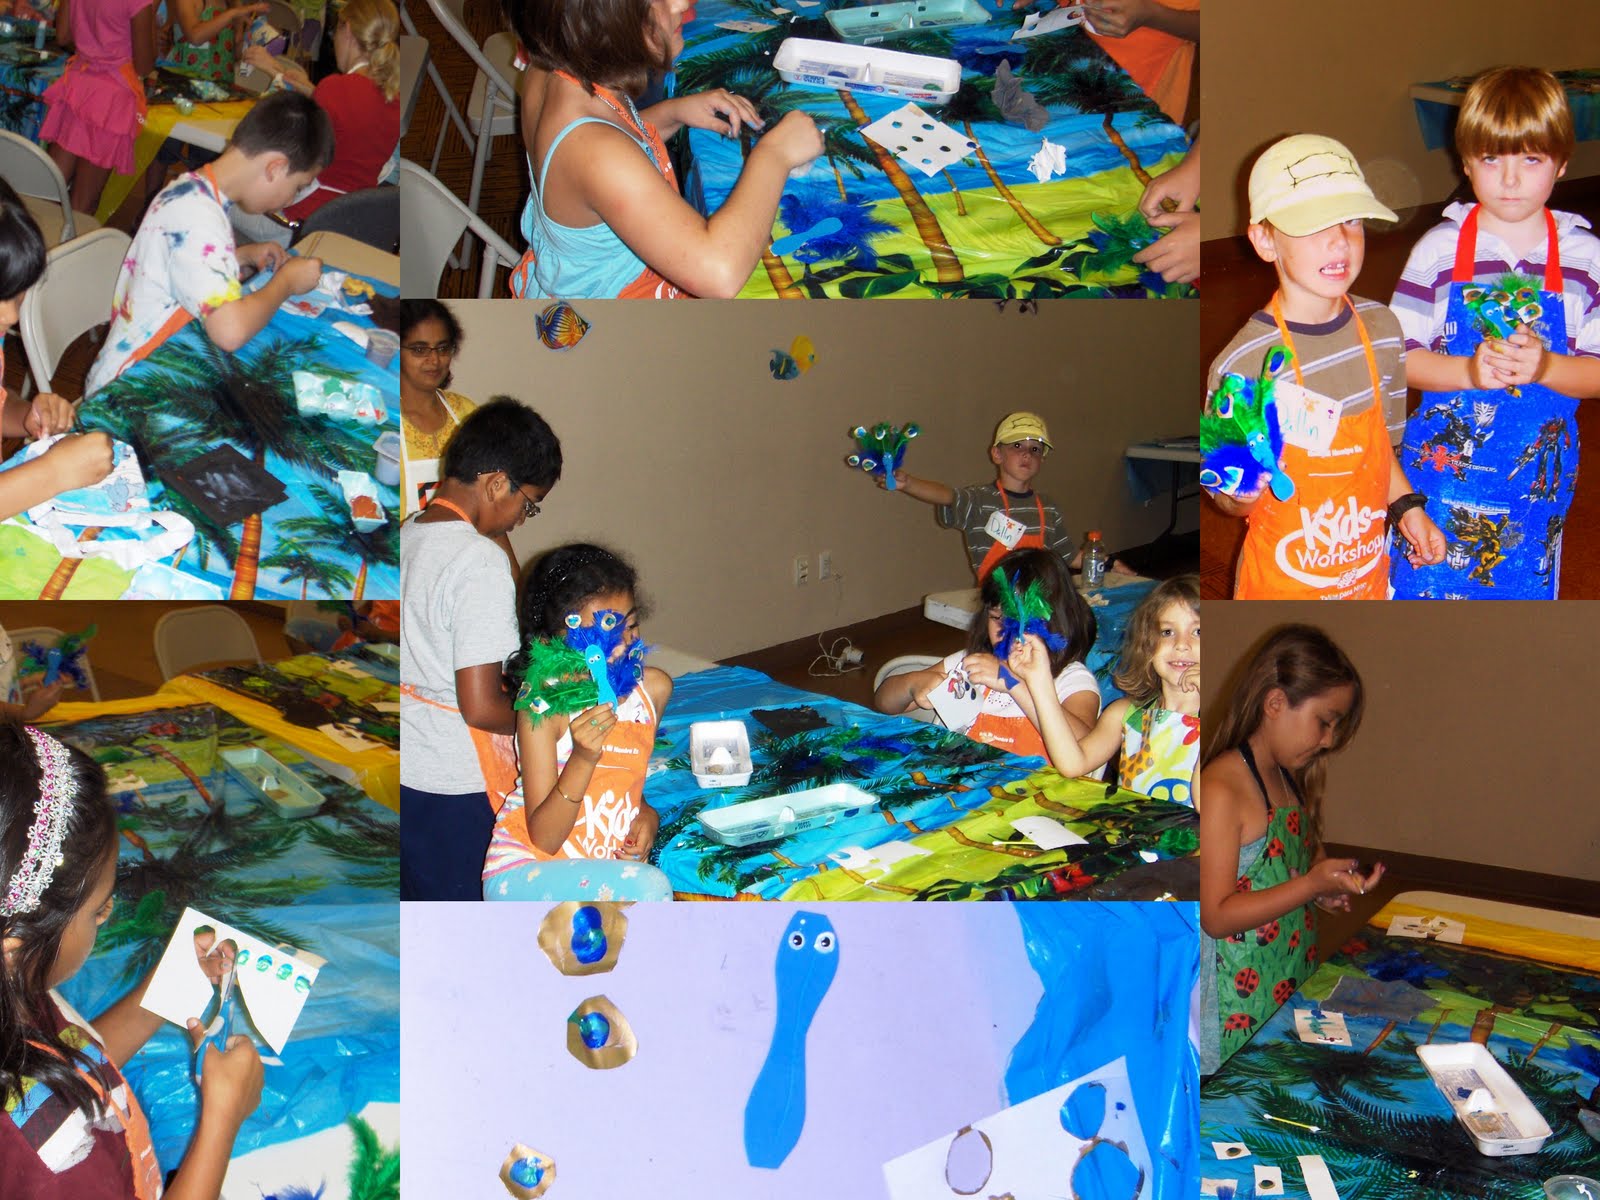

Subscribe to:
Comments (Atom)