Friday, June 27, 2014

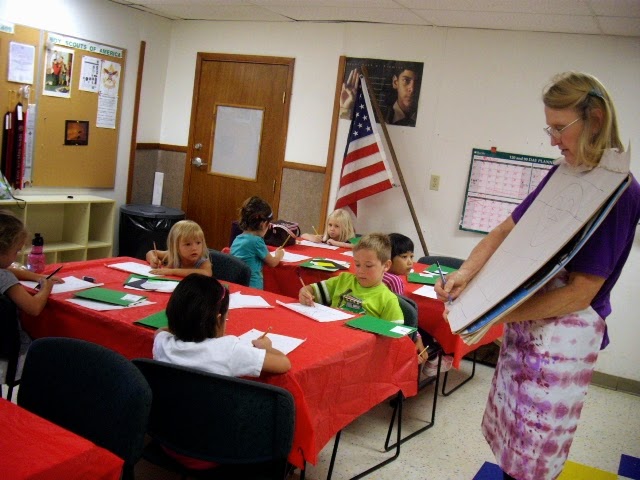
3D camp with lots of media @ the WB Annex

I have to say that our project today is probably one of the best we have done at camp. we really took the time to get every detail on every one of them exactly the way we wanted them. then we spent time painting a mountain on really big newsprint paper. Just fun to do and a lot more painting than anyone ever expects.


we tried lots of things today with a focus on 3D and textures. We made a multi-layered object then marbled it with shaving cream paint. we liked it so much we did cards too. We made a butterfly with foil wings and a beaded body then gave the wings a coat of shiny paints. we used the marbling paint on coffee filters then made bowls and vases out of them and last we shredded a lot of crayons and made melted wax pictures. Thanks Kat Sands for teaching a lot of the sessions this week.

Tuesday, June 24, 2014

All about clay recipes

so many asked what the recipes were for the clays we used at camp this week and at the library program in addition to the polymer clay and fireable clays. I found all the recipes on the internet and am thankful for the thrifty moms who post.

No Cook Salt Dough Recipe

Ingredients
2 cups white flour 
1 cup salt 
1 cup water
1 tablespoon lemon juice  this makes it dry harder)
1 tablespoon oil ( this makes the dough easier to work with)

Instructions
1. Mix the flour and salt very well in a medium sized bowl.
2. Add half a cup of water, and the oil and lemon juice if using. Mix well.
3. Gradually add more water, bit by bit, until you get a workable, non sticky dough.
4. Shape to your heart's content. I had the kids make whatever their heart desired, while I made beads and buttons to use for a future activity. Lee made a "choo choo train", while Ike made... who knows? A sun? An octopus? A pile of mush? He kept on changing his mind.
5. If, while shaping, the dough starts getting a little too dry, add a sprinkle of water (but just a sprinkle!) and mix it in to the dough.
6. Let your salt dough dry for 3-4 days, turning over every 24 hours to help it dry faster. If you want it ready quicker, stick it in the oven on a low temperature for an hour or two.
7. When dry, paint as desired.bowls, salt, flour, water, wooden spoons,  

Cornstarch salt clay
3/4 cup flour
1/2 cup cornstarch
1/2 cup salt
1/2-1 cup water
1 tsp oil
powdered tempera paint

Instructions
1. Mix all dry ingredients in bowl with spoon or fork.
2. Make a well in the center, add oil, and begin to add water until the clay starts to form a ball.
3. Turn onto surface and kneed until smooth. 
4. put into sealed bag if not using right away. If it seems to damp add a bit of cornstarch, if too dry a spritz of water.

Homemade Polymer Clay
  • 3/4 cup white glue
  • 1 cup cornstarch
  • 2 tablespoons mineral oil (I used baby oil but reportedly even vaseline will work)
  • 1 tablespoon lemon juice
  • Non-stick pot
  • Wooden spoon
Steps
Add cornstarch to glue in a nonstick pot. Mix together and then add mineral oil and lemon juice. Blend well.

Cook over low flame stirring pretty much constantly (you can take a quick break or two if your arm gets tired, which it will) until the mixture resembles mashed potatoes.

Remove from heat! Squirt a little additional mineral oil around the top of your mashed potato mass and with your hands, remove it from the pot. Knead until smooth. It's best to do this while it's still as hot as you can handle.

Pull off a bit to work with and put the rest in a re-sealable plastic bag with the top about half-way open until it's cooled down a bit. Then seal the bag (with as little air in it as you can) and store in the fridge.

Let dry about 2-3 days, then paint, or not.
- See more at: http://thenewnew.blogspot.com/2011/06/homemade-polymer-clay.html#sthash.cPDpQEC5.dpuf

Thursday, June 12, 2014

Painting and drawing birds at the WB Annex mini-art camp

It was a fantastic first day of art camp! We are using a grid drawing method this year and it is really paying off in helping with shape and proportion on a more difficult theme--birds. We talked about local birds naming the ones that we were familiar with and the ones we had seen. kids are willing to try anything and we did.
We hit on some bird facts: hawks fly 120 mph when diving. The younger kids read a couple of books and created all kinds of owl projects in the morning. the older kids learned quilling and created an owl on an index card. Once they got the hang of it many added branches and other details. Lots of broken sticks for some of them. The final project was a watercolor of the teal winged duck supplied by our local birding group. Not everyone liked my streaky feathers and many smoothed theirs then added water and sky to them. They all got the beautiful teal and blue wing in.


Day 2 was more painting--painted birdhouses and the teal wing water color for the beginners, a hummingbird for the Jr group. The younger group created an edible nest with eggs (way too sweet we decided) and little pompom birds for their birdhouses. The older group  investigated peacocks and the did a pastel drawing on black background of a peacock. They decided it looked far better on black than the one I did with another group on white paper. They also got

to make their dodo birds or a bird of a different sort.

Resource books for the week from WBCL:
 Baby Bird's first nest
 The book of North American owls
 Eagles
 Eyewitness Books: Eagle & birds of prey
 Hawks
 Meet the peacock
 Thunder birds: nature's flying predators
 Duckling days
 Fine feathered friends
 Hooray for Diffendoofer Day!
 If I never forever endeavor
 Feathers and fools
 Fly by night

Photos at: drawing birds 14 Jr day 1  & drawing birds 14 beginners day 1

Painting drawing birds JR day 2  painting drawing birds beg day 2

Wednesday, June 11, 2014

Painted peacocks from real pictures @WBCL


We were so fortunate to have real pictures taken by local photographer Rob White to use as a reference for our painting of a peacock. First we drew the bottle shaped body and painted it with blue metallics. Then the fun began. I asked them to use their fingers to dab in the "eyes" on the feathers so they could paint the detail. Only had one objection so he did his with a brush. we put on plenty of eyes then detailed them, lastly connecting them to the body and adding the crown to the bird. We will be doing one of these at #art camp next week.

Squashed paper flags for Memorial day @WBCL


I keep trying to do something a little different to stretch the kids' (and parents) imaginations and skills while using the wonderful donated materials I continue to receive. For this project we used an A5 envelope and red & blue streamers. First they drew the American flag--yes it has 13 stripes and a square on the LEFT. they tore the streamers into pieces about 1 1/2" long and made piles of paper wads. They then dabbed on glue and squashed the paper wads into place. They were supposed to leave spaces in the blue are to represent stars--that was hard for some of them as they just would rather have had white to squash up. In all though it was a great time doing this one.

AD