Showing posts with label science. Show all posts
Showing posts with label science. Show all posts
Wednesday, July 20, 2016
Art Camp still has a few spots for Juniors this summer
Quoting WB MUD Manager Matt: "You blew up skittles!" We made a fountain of suds and fizzing with vinegar, baking soda, and powder paints, placed inside out film canisters! 2 spots still open for this year's sciency art camp Aug 2-4. Call 512-251-9814 to enroll. Age 8-12
Sunday, June 26, 2016
Registration open for remaining summer Art Mini-Camps
Art Mini-camp Give your child a week of intense creativity and the freedom to do art “their way”.

Juniors: 12-3:30 Tue/Wed/Thurs Age 7 1/2 - 12
July 12-14 Drawing & painting - We are going to draw cartoon dogs, a cat, paint a guitar, learn to create clouds and waterfalls, and a martian or winged fairies. They will do a Georgia O’Keefe landscape and glass painting. We’ll pull out charcoals, pastels, great paints and have fun with them. FULL
Photos of our art guitars
Photos of our art guitars
August 2-4 Lets imagine it/ lets make it (Our version WACKY science) we will explore our creativity and make things that move and interact like the rolling thunder explosion and structures that bend, kaleidoscopes, spinning things, pouring things. 2 spots
August 9-11 Design it and make it--bags and mosaics and jewelry and more. We’ll create our own designs and decorate the results
Beginners: 9-11:30 Tue/Wed/Thurs Age 4 1/2 - 7
July 19-21 Artistic fun with Foods-FULL would it be more fun to eat a salad if it were a train or a skeleton? we will eat some of our art at the end of each day—fruit pizza, train salad, make a recipe book, decorated plates for lunch.

August 2-4 Wild n Waacky Arty science We will make our own fossils, investigate colorful chemical interactions, create crystals, make our own clays, and explore color. 2 spots
Join us for the art mini-camp program held in Wells Branch and sponsored by the Wells Branch MUD. We pack lots of activities into each week of three 1/2 day sessions: painting, drawing, 3-D art, fabric painting, mosaics, clay sculpture, murals, art discussions, and stories.
$45 per week per child. All materials included.
Each week has its own theme. Enroll for one or several. Registration in person or by phone at the WB MUD at 512-251-9814 or visit them at 3000 Shoreline Dr. http://www.wellsbranchmud.com/parks-a-recreation/youth-programs Online registration is open with active net.
We are at the WB Rec center, 3000 Shoreline dr so it is easy to coordinate with swim team and lessons.
Camp is taught by Dianne Koehler
Wednesday, May 11, 2016
 Join us for the art mini-camp program held in Wells Branch and sponsored by the Wells Branch MUD. We pack lots of activities into each week of three 1/2 day sessions: painting, drawing, 3-D art, fabric painting, mosaics, clay sculpture, murals, art discussions, and stories.
$45 per week per child. All materials included.
Each week has its own theme. Enroll for one or several. Registration in person or by phone at the WB MUD at 512-251-9814 or visit them at 3000 Shoreline Dr. http://www.wellsbranchmud.com/parks-a-recreation/youth-programs Online registration is open with active net.
We are at the WB Rec center so it is easy to coordinate with swim team and lessons.
Camp is taught by Dianne Koehler
Friday, July 10, 2015
Wild & Wacky Science art for Juniors WOW
 We took a new direction and did some experiments, some art process, added an architectural project and did a rolling waterfall of color as our exploding paint. We started with a crystal painting project using epsom salt in super solution. Once everyone understood that heaving painting was required it really worked well. RECIPE [ 1 cup very HOT water, 1 cup+ epsom salts, food color or tempera paints]
Clay is always popular at camp and we used plain polymer clay to make medians then imprinted them using small pinecones, shells and other natural items. The camper made them into necklaces, mobile hangers and more by painting them after we baked them and stringing them onto cording.
 We tried out the chemical reaction between permanent markers and alcohol on a CD and although the kids were pretty pleased, I felt it should have worked better. The marker ink does spread and is fun to watch the changes.
 We also got to use stretchy clay to make critters. It was a bit older and does not really work well to stretch and pose. the critters they made pleased them though. It is much smellier than regular polymer clay.


We spent some of the last day creating airplanes from clothes pins, crafts sticks and helicopters from folded construction paper helicopters so we could fly them. flying helicopter http://babbledabbledo.com/diy-toy-paper-helicopter/
The junior councellors went all out to get a project working to explode the paint. We tried film canisters of two kinds with their own tops and with corks to no avail. Then they lined up all the canisters and had the kids put in baking soda and tempera powder and slowly went down the line pouring vinegar into all of them. It is between a colored rolling waterfall and a skittles fountain. skittles fountain The kids love the reaction between vinegar and baking soda but without a larger bottle to blow due to the gas nothing blows up.
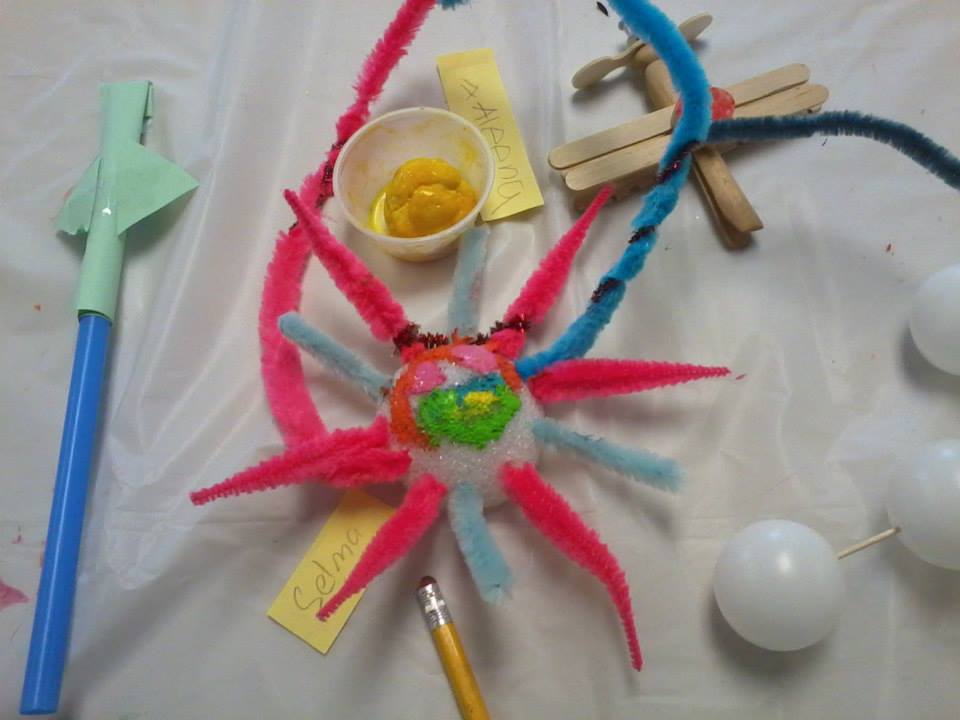
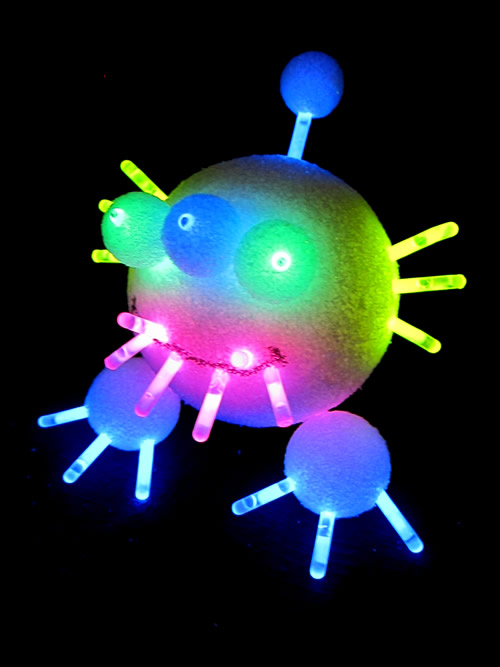
Our last 2 projects were to use the styrofoam eggs and balls with ping pong balls and create an alien and make bouncing balls from borax and glue. Not sure which one was more fun but getting the large amount of food dye off the kids requires baby oil, dishwashing detergent and lots of scrubbing plus some color theory on complimentary colors and why that helped get the color off more quickly, i.e. red on green.
We have an album on Facebook with many more pictures for you to view.
Wild and Wacky science art for beginners better than ever
We really stretched out this time to include new and different things for the kids and let them do many experiments with artistic involvement. You have to think about art being more than drawing and painting as we usually do. We included all kinds of home made potions and still managed to create quite a number of projects to send home.

 The beginners got to do food color and celery changing color and loved it. We mixed homemade salt clay then made creations from them. The kids loved adding in the color and kneading the dough until it was ready to use. They were less sure about sharing their clay even to get a second color.


RECIPE [ 1cup flour, 1/2 cup salt, 1/2 cup water, 1 tsp oil, a little tempera powder]
We drew hot air balloons and colored them by layering on tissue paper and spraying it with rubbing alcohol. Turns out nice too.
 I brought leaves from my Turks cap to paint on the veined side and do color stamping with. Once the kids got enough paint on it really took off as they could stamp repeatedly with one leaf. The erupting paint was much more fun to make as everyone got to stir some of it up and add colors to it. It only foams for a few seconds but those were good seconds. RECIPE [ 1/2 cup flour, 1/2 cup baking soda, 1/2 cup or so water, food coloring]
 Our crystal painting got mixed without their help as it involved very hot water. RECIPE [1 cup HOT water, 1 cup+ epsom salts, food color or tempera paints]
We tried out hand at making our own crayon scratch-outs and did not get them dry before the end of camp but the kid learned how to do it: RECIPE [heavily applied crayon on paper, tempera paint with dish soap applied heavily and let dry]
 we also did a magic milk experiment but thinned it a bit too much so we could not take prints RECIPE [milk, drops of food color, toothpick with dish soap on it] and lastly we made kaleidoscopes and straw airplanes that flew very well. Wish I'd cut the helicopters for the younger kids that we did in the older kids' camp.

 The beginners got to do food color and celery changing color and loved it. We mixed homemade salt clay then made creations from them. The kids loved adding in the color and kneading the dough until it was ready to use. They were less sure about sharing their clay even to get a second color.

RECIPE [ 1cup flour, 1/2 cup salt, 1/2 cup water, 1 tsp oil, a little tempera powder]
We drew hot air balloons and colored them by layering on tissue paper and spraying it with rubbing alcohol. Turns out nice too.
 I brought leaves from my Turks cap to paint on the veined side and do color stamping with. Once the kids got enough paint on it really took off as they could stamp repeatedly with one leaf. The erupting paint was much more fun to make as everyone got to stir some of it up and add colors to it. It only foams for a few seconds but those were good seconds. RECIPE [ 1/2 cup flour, 1/2 cup baking soda, 1/2 cup or so water, food coloring]
  Our crystal painting got mixed without their help as it involved very hot water. RECIPE [1 cup HOT water, 1 cup+ epsom salts, food color or tempera paints]
 We tried out hand at making our own crayon scratch-outs and did not get them dry before the end of camp but the kid learned how to do it: RECIPE [heavily applied crayon on paper, tempera paint with dish soap applied heavily and let dry]
 we also did a magic milk experiment but thinned it a bit too much so we could not take prints RECIPE [milk, drops of food color, toothpick with dish soap on it] and lastly we made kaleidoscopes and straw airplanes that flew very well. Wish I'd cut the helicopters for the younger kids that we did in the older kids' camp.
Saturday, June 27, 2015
Planning for wild and wacky art camp gets complicated
 I always want something new and different to excite and entice but keep getting asked "what about the volcano? are we doing a milk thing?" Guess there is a desire to do the familiar and fun too. We are going to try some new stuff this year like building a structure with crafts sticks to see how well we engineer and some old stuff like making a kaleidoscope, using materials in a new way painting with crystals in solution, and experimenting with the movement of color through materials. The younger set gets to explode paint and make a new kind of clay and everyone gets a try at luminescent paints. Just my thoughts.
Saturday, June 29, 2013
2 science camps keep everyone very busy and excited
 |
| fluid migration and color mixing |
 |
| borax crystals |
 |
| epson salt crystals |
http://candy.about.com/od/hardcandyrecipes/r/rock_candy.htm--rock candy-- thin wood sticks in test tubes
 |
| making goop or oobleck |
http://www.playcreateexplore.com/2012/08/summer-snowball-fight-with-fluffy-stuff.html
goop--http://www.exploratorium.edu/science_explorer/ooze.html
 |
| clay landform and sand |
clay #3 http://chemistry.about.com/od/chemistryactivities/a/modeling_clay_recipes.htm
 |
| erupting volcano |
erupting volcano--soda bottle 12oz works well, 4-6 oz vinegar, 1Tbs baking soda, 2-3 drops Dawn detergent, food colors
colored water experiment (jr) http://wemadethat.blogspot.com/2013/03/water-transfer-experiment.html
 |
| Paper casting using white envelopes |
 |
| snowball fight |
 |
| space ship from tomato container |
 |
| imploding a can |
Day 3 jr
Day 3
Sunday, July 22, 2012
Wild Wacky science n art for Juniors


Some of the projects were ones in motion--spinning tops and jumping bits - magnetic attractions between chenille stems and magnets or magnets and other magnets, milk and coloring, and water action on filter paper. You can click on any of the following pictures to view the video clips of the activity.
| ||

 |
| Magnet dance |
 |
| working with color and colloids |
 |
| Fun with tops |
Sunday, July 1, 2012
Wild & Wacky Science art mini-camp volcanos and more
 We started the week making crystals and had fun mixing up each concoction. We made crystals from Epsom salt which makes needles in the fridge, salt that blooms on a sponge, borax over chenille stems, and geodes from alum. Most take days to make although the Epsom salt ones show growth within 24 hours--lots of fun to look at.
Although it is not strictly natural science the mechanics of catapults seemed a natural fit and as in the first week of science camp creation caused a lot of concern about their fingers but once the first ball was launched on one seemed concerned about anything except how far their ball would go and who they could hit with it. Check out the video: catapults1 and catapults 2


It takes a day or so to set up well enough to unearth the fossils from the sand. We used large tubs to support the castings and catch the sand. They brushed off sand with stiff brushes until they could see their cast fossil copy then let it dry a bit more and rebrushed. Once the sand was off the results were pretty amazing--the kids were picking out things on the surface that they recognized from the pressing part and were pretty impressed.

Constructing a volcano from a juice bottle is easy using rigid wrap and newspaper. Everyone shaped one and set it out to dry. On Thursday they
 just looked too white to this group so everyone painted theirs before the eruption. (click on picture to view) From art camp 2012
The results were satisfying but more to come on that as we invite the younger kids to the eruption.
Sunday, June 24, 2012
Incredible insects at art mini-camp

Most of the group saw the egg critters the younger kids made earlier in the day and had to create one. It was good learning on use of glue guns and design.

For the next project we used milk cartons and a variety of woody items, pine cones and glue to create a bug habitat. This group did not want bugs to inhabit these and were generally not into insects--hard crowd on this but the trip to look for bugs turned into more of a science project as they discovered their magnifying glasses could concentrate light and ignite leaves and wood fuzz.

 Edible projects are fun to do and usually intrigue most of the kids. I secured kits from the Smithsonian to make gummy bugs. They had to measure and mix and use pipettes to fill the forms. A day's wait and removing the gummy bugs was a bit hard but we got it done. Apparently they didn't taste too bad as they were all gone.

 Kat thought they would like to draw the Tracker Jacker from Hunger Games and the Mockingjay so led them in the drawing project. The drawings are really good and the coloring and shading are coming along.
We discussed scarab beetles and their place in Egyptian culture then used Fimo clay to create one for our last project. Our favorite example was the brightly colored beetle with metallic blue, green and gold. some painted their this way but most went for bits of gold. They learned how to soften and manipulate this clay and make legs and eyes stick.
Subscribe to:
Comments (Atom)