Wednesday, November 13, 2013

Pinecone turkeys will be centerpieces at many Thanksgiving tables


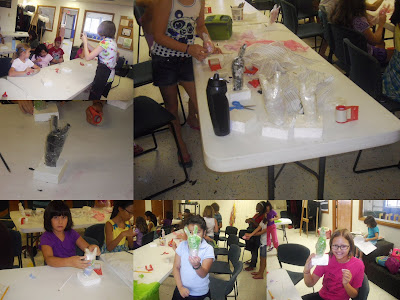
Of all of the Thanksgiving projects we have done, I think I liked this one the best. We started by selecting our pinecone and making the head from salt clay. The kids and their parents made the wattle and beak and set them in with glue. They then painted the head and added wood stars to the bottom to make the turkey more balanced. We had all kinds of small feathers and they glued them on the pinecone--some onto a few of the heads too, a few even added wings. 

Tuesday, November 12, 2013

Bottle caps and other findings make really fun art @WBCL


We have done projects before with a variety of bottle capsAnd they are always interesting to work on and see what the kids come up with. This time was no different except that I had a number of other small plastic objects to put into the mix for them. We started with an 8 x 8 piece of cardboard as it is rigid enough to use for the project. They selected the caps, Beads, and bits of plastic that they wanted to use on their project. At some point one of the moms asked about glitter and several of the girls chimed in "oh yes." It is interesting to see how differently every project turned out.

Saturday, November 2, 2013

Face painting for Dia de los Muertos party

 This was such a fun party. The theme was Dia de los Muertos and we did the sugar skull faces on the kids and grown ups too.
Posted by Picasa

Thursday, October 31, 2013

Spiders and their webs @ WBCL


Coming right after the spider guy presentation on Saturday, this seemed like a great project todo. I had a large stash of wooden beads that I sprayed black and inserted a small dowel into the hole. I made up two samples of these so that the kids could see how these spiders were assembled. Generally their skills at twisting the chenille stems are hardly equal to the task, but this time almost everybody got their spiders legs on with no difficulty.  we used a touch of glue you add a tiny pom-pom at the  front where the mouth would be. We also added wiggly eyes to finish the spiders. Some of the kids decided that the large body was the spiders head and put the eyes there.   for the spider web we cut sheets of black card stock diagonally then had the kids pencil in the lines of the web.  Many of the kids added bugs for the spider. Some said that they didn't like the spiderweb I did and instead had very curvy lines for their web. Guess the spider gets to go where he wants to go.

Friday, October 25, 2013

Make mine owls @WBCL

 Everyone loves owls and we had a lot of fun making these from recycled materials. I found a picture of an owl on interest that used egg carton cups for the eyes so we started with that used the rest of the cardboard egg carton to made them unique. So many different ways to create an owl  all using the same materials.

Posted by Picasa

Friday, October 18, 2013

Aliens and other critters from bread clips @WBCL

This was another project that I found the inspiration on Pinterest. We have been collecting the bread clips since early summer. Finally we had enough of them to schedule this project. The idea of aliens and monsters fits right in October. I also found some wood pieces that kids used to help create their project. As always wiggle eyes are a real plus in creating a project.

Friday, October 11, 2013

Making Columbus’s ships @WBCLs

 We learned a bit of history, talked about Columbus, and created a picture of Columbus'I ships coming to America. Most of the kids didn't know anything about Columbus and the idea of him sailing over 500 years ago went over their heads. We were able to pull a couple of books and look up the information about him and his ships. This is another project where we were able to incorporate recycled materials and donated items.
Posted by Picasa

Thursday, September 19, 2013

Watercolor painting fall leaves @WBCL

 Watercolors are always fun to do because of the oh wow factor. I sometimes worry a bit when I get the much younger children in the class How they'll do but as usual they had a fantastic time creating this project. They even learned how to shade the edges of the leaves and scribe in the veins. Initially I had planned to have them trace their leaves onto the paper but decided that it would be better if I did that part and they did the painting part. We went over having a Clear water brush and cup and a color painting brush. First I had them paint one leaf with water then get a bit of the color and trace around the outside at. Sometimes they didn't do the same leaf that they had put water on requiring a quick fix to help the paint spread. It didn't take long before everybody had it figured out. Palette knives were in short supply last night so we used a number of other items like Spoon handle's and scissor edges scribe our leaves. What a great job they did.
Posted by Picasa

Making piƱata for Diez y seis de Septiembre @WBCL

 This project was just a little complicated but everybody was able to complete it with very little difficulty. We began with quart milk cartons and cut the bottoms off. I cut all of the lengths of tissue paper in advance and had the kids cut their own fringes from the long strips. They first had  to glue squarish pieces across the bottom of the carton. We then added layer after layer of fringes until we got up to the top. We opened the top of the carton and punched holes on both sides to insert a cord as a hanger. Most of the kids continued their fringe up to the very top of the cart. We then added a bit of streamers to the bottom and sent them home to fill it with prizes or candies or whatever they wanted. We had a discussion about how to break the piƱata to have the items fall out. We also had a discussion about Mexican Independence Day.
Posted by Picasa

Sand painting a sea scene @WBCL

 This is just such a fun project. It was our end of the summer time and the kids really went after it. First they drew their idea of what a beach scene would look like. Then we gave out paint mixed with Very fine sand and had them use pallet knives to spread it onto their designs. For some it was a bit of a reach in the beginning, for others they took right to it. In order to make it even more fun, I  set out a box of seashells that had been donated for the program and let them sort through and glue them to their completed picture. Some chose to add them to the design while others just added them around the border to frame their pictures. Great job by all.
Posted by Picasa

Friday, September 13, 2013

Jewelry making from recycled materials @WBCL


I saw the ring making project on Pinterest earlier this year and put the call out to the neighborhood and the parents in this class to save the little ring pulls from cardboard drink and milk boxes. Finally we had enough to do our project. In order to be sure that our sequins and jewels would stick to the plastic I gave each one a quick sanding. We used Alenes tacky glue then added sequins, beads, and big gemstones from a donation. I also had some fun foam bookmarks that I thought would be ideal as bracelets. We were not disappointed. I little Velcro on the ends then the kids covered the entire top with a variety of sequins and beads. Everyone went home wearing their creations. This was a great project as any age of child could do this with a little help from mom or dad.

Wednesday, August 28, 2013

Learning to weave on a frame leaves no one behind @WBCL

 This is an adaptable project that just works better each time I bring it out. I used the plastic lids from tomato boxes as they had notches along the edges to use as pins to start the weaving. We talked about warp and woof and how we were going to do the project. Everyone got a long piece to set their warp and a needle and shorter pieces to do the weaving. A lot of "over and under" was mumbled as they got the piece going and could not wait to add the beads into the design. Some got a lot, some got just a few. All were removed from the frame and tied to hang complete with beaded fringe at the bottom.
Posted by Picasa

Friday, August 16, 2013

Castles, princesses and knights take center stage @WBCL

 This was an expanded project from one I did before with the summer group. We used a boutique kleenex box and 2 paper towel tubes to make the structure for the castle. I supplied paper and glue while they did all the imagination part. I also put out tp tubes to make either a knight with foil armor or princess. What a great variety we got by the end of the time. There were drawbridges, turrets, and a pair of the prettiest princesses yet with paper dresses and crowns. Another fantastic recyling project.
Posted by Picasa

Monday, August 12, 2013

Cute horse/dog marionettes from TP tubes @WBCL

 This was such a fun project for us to do and was the sample for my group doing it at camp. The kids had to thread ribbons through holes that I drilled in toilet paper tubes to make the legs for their marionette complete with bead feet. They also had to thread strings through a sample cup and the tube in order to attach the head and let it move. We added self stick eyes, yarn manes for the horses and tails for both horses and dogs. The strings were attached to rings from the wedding department so that the animals could prance and run. This was such a fun project to do and easy enough for all the participants.
Posted by Picasa

Thursday, August 1, 2013

Old jeans become denim bags with lots of detail @WBCL

 A freind gave me a bag of blue jeans for an art project and this one  just grew into being. I had lots of felt and thought the kids could cut it up and make flowers to attach to the bags. I also had a large donation of buttons to add to the mix and plenty of squeeze bottles of fabric paint. They cut flowers and so much more--stars, houses, what looks like a dragon, cute stuff and slitted it so the brads would go through. Many fashion statements were worn out the door and the group seemed really pleased with this project.

 I still have the pockets to go for another project. Just thinking what to do with those….
Posted by Picasa

Mixed media experiment @WBCL

 After a great project at camp, I decided to try the mixed media page with this group too. We used peel and stick shapes and covered them with tissue paper instead of cutting out our own shapes but it worked out well.  Once things were glued down well we added glitter tempera paint to accent the project. Idea was to be able to cover a book but I think it is going for something else.
Posted by Picasa

Wednesday, July 31, 2013

Mixed media mini-camp bring out creative thread @WB Annex


 It was a week for learning new things, combining things and generally playing with lots of materials to create our projects. We started by learning to do tape sculptures using our hand to form a bunny. Sticky fun but they turned out really well--even on the few kids who wrapped the tape so tight I thought we'd have them encased forever.

We moved on to a recycled project using a CD, tiles, brass candle cup inserts and knife handle to make an owl. Our last project was a metal sculpture on a 4x4" canvas. The kids used the metal bit in so many different ways being only limited by time.

Pictures of day 1
 We started the 2nd day learning to do simple weaving on the back of a hotel card with slots cut into it. The campers did not not have difficulty doing the initial wrap and pretty soon everyone had depleted the first piece of yarn and was asking for more. Most added beads or other items they found in my parts box. Quite a few went home with their card and needles to make more.
 We split into groups for this one and still the over whelming smell from nail paint was pretty strong. The campers got a 2" metal disk and painted a layered design on it using the nail enamel. They later added a ribbon to it so it could be hung or worn. This has been a great project for groups except for the smell. It always turns out great.
Our last projects of the day were to teach layering and use of objects to make a background. the campers had to sand the surface first then add string to one in the shape of a curly tree. The other one got lots of paper shapes then random layers of tissue paper, some what nots, a large  layer of tissue applied with decoupage glue, then a bit of a dry and painting using sparkle tempera paints. Wish we would have gone slower and added stuff to this one the next day.
Day 2 pictures


We started the last day of camp with a challenging finale--to create a total design using a variety of papers and the techniques we learned during the last 2 days. They created either a guitar or a hot air balloon as their project adding beads, threads and other items over the paper background. A couple of campers like the look of the overlay of tissue paper and glitter paint and finished theirs in that manner. It was a really great way to finish up.

Our last project was more of a 3D than mixed media per se. I got glass panels from a friend. We drew a pattern for a goldfish or Koi then painted sea weeds on the back of the glass panel. We then flipped it over and painted the fish on the front side complete with shading and color mixing. Everyone got a ribbon to string through the hole to hang it up. Lots of wows on this one as it dawned on them how they were creating depth.

Day 3 pictures
Guitars and hot air balloons

Monday, July 22, 2013

Making fish masks from recycled containers @WBCL

 Masks are always fun to make because they take on a life of their own. I was given a large pile of squarish plastic tubs and thought they would make great fish. We started with a sheet of yellow paper and instructions to make eyes in a variety of ways. I also showed them how to make puffy lips and let them do their fish "their way." It always works. some added streamers for fins, most just worked on the face and had lots of opinions on the shape of things. It used up some of my stash of odd paper pieces but not a lot.
We meet every Wed. at 6pm for a family time creating crafts projects and art work.
Posted by Picasa

Saturday, July 20, 2013

Chopping and slicing and making cinnamon mountains, veggie skeletons and egg critters @WB Annex


 This group is in love with the slice and dice moves. We set up our own slice and dice table with 3 dicers, 3 cutting boards, and a number of small knives. Little did we know that the slice and dice activity would be as popular (or more) than making the food projects. Thanks to neighbors for loaning us crinkle cutters this week. Pickles, cucumber and celery are so much more interesting if the edge is all crinkly. The pictures tell it all although the scrap crust cinnamon mountains were a real hit.

These are supper easy to make and take care of the bread crusts that so many kids want to throw out.
You need about 2 cups of crusts torn up into little pieces, 1/2 apple grates, about 1/3 cup water and cinnamon sugar for on top. Once we combine the first 3 ingredients we divided the dough into piles for each camper who formed them into a volcano shaped pile. The kids then sprinkled the top with a teaspoon or so of cinnamon sugar mix. We baked them about 15 min at 350.  One of the campers went home and fixed this desert for her family.
The group competed to make the best veggie skeleton then voted on each others and awarded most colorful, most variety and most unique. It was fun to see the skeleton families--including pets. Most of the skeletons didn't make it past judging as we are a hungry group. The egg critters were also fun and didn't last long. I got to take a couple home but from the egg monster with a carrot center to the egg under trees with 4 baby eggs to the bunny egg we had fun with our food.  We used a few cookbooks for kids from the library:  The international cookbook for kids, The kids' multicultural cookbook: food around the world, and a couple of mine including Pizza Art.

For all the pictures:
 Food art camp day 2
Food art camp day 3

Tuesday, July 16, 2013

Making pizza, rice salads, and painted cookies at Food art mini-camp @WB Annex

We started the week with a discussion of  kitchen safety and what would make food look better we started by making chef's hats. Of course several of the hats fell over the kids' faces which just made everyone laugh. We quickly whipped out pizza dough from a packet and formed it into themed personal pizzas. The kids put on lots of veggies and lots of cheese. Got to grate their own and even used my revolving grater.  The themes were the beach, a forest and the park.

Our next project was to make a rice and veggie dish to go with our theme. The kids got to cut, chop and disect cucumbers, tomatoes, peppers, zucchini, celery, and onions to decorate the rice. What was called for was more color and they hit my food color to make blue water and greener trees. wow what colorful stuff. They were concerned that the blue rice would taste funny (it does not) We finished off painting sugar cookies with gels made from Karo syrup. The cookies went really fast.  More pictures are on FB at: Food mini-camp day 1

Friday, July 12, 2013

Drawing dragons @WBCL

I was give some heavy Crayola paper with fluorescent markers by a neighbor earlier this year and thought we would use them on this project. Perfect! I had all the kids draw along with me to create their dragon on one side of the paper. Great drawings by all from the wings to nose to tail. Then we colored them in using the markers. The markers develop over time so they are not too bright or glowing in the first few minutes but when they get going -- wow--the design just shines.

Dragons and mythical creatures art mini-camp @WB Annex 2

Finishing off the week with more project and as one mom put it "more magic." When we attempted wire art earlier this summer most kids had a hard time with it but this time we were in the grove.
We did a fairy or elf first using chenille stems, pony beads, a clay bead I made, and wire ribbon for wings and clothes. The guys wanted swords so created them from wood sticks and aluminum tape. Several of the elves were totally dressed in aluminum tape armor by the time they were completed. I saw sword fighting going on and then the creations got to climb aboard the dragons we made next.

Following along with a complex wire project is always a challenge but everyone got a dragon created in the end with wings and many with fire spitting out the front. I found very large chenille stems that were more curly at Oriental trading for this one and used some glittery wire mesh for the wings. Of course the eyes and some of the pompoms just needed hot glue. The kids are in love with it once they use it. The idea was to make them small enough to fit into the eggs but most of them sat on the eggs instead.
We talked a bit about the types of dragons and how Chinese dragons are different from the European ones. We created the dragons from a paper bag and strips of colored card stock joined with brads. They are decorated with all kinds of paper from shred to tissue paper, paper plate pieces to construction paper. some had long tails with streamers on them. We were even able to add bells to them and a chenille stem or two. Our dance was very short as time just ran out but lots of fun anyway. 

Dragons and mythical creature art mini-camp @WB Annex


Dragons was a popular camp session a couple of years ago so we decided to expand it and repeat it this summer. We started the week making a clipboard project from a library book, Funky Junk and went from one medium to another getting dragons, fairies, unicorns, and more created.  

We used small lemonade drink bottles as the base for our paper mache project. The mache was created from envelopes and school glue but was too wet so it got to spend a day in the oven at 225 degrees. It dried out well but the bottles got kind of puffy on the bottoms so to paint them we had to nestle them onto foam sheets. The kids made everything from a penguin to creatures from movies complete with swords.

I was given some red fabric that seemed just the thing to make dragon banners at camp. the kids did not have to draw their own dragons but they picked their colors and techniques to paint them. At the end they could use squeeze paints to outline and highlight some of the areas.
Fimo or sculpy clay is really colorful but was hard for us to work with in the past. I cut lots of dowels into rollers and once we got the clay soft the creations began. They not only made unicorns and dragons but an assortment of items for the fairy gardens the next day.
Using gourds supplied by a friend and lots of "stuff" each camper created a fairy or dragon garden on a base of styrofoam.  We had a number of grassy items from model RR and floral kits, stones, tiles, silk flowers, silver rings, small pieces of wood for signs, our clay mushrooms and pieces, little birds and lots more that I was able to accumulate.

Many more pictures are posted online on FB:
Dragons art camp day 1
Dragons art camp day 2
Dragons art camp day 3

Saturday, June 29, 2013

2 science camps keep everyone very busy and excited

fluid migration and color mixing
What explain we had this week. Both groups made all kinds of crystals, and delved in earth science, space science, and using household items to create a lot of fun. The kids were amazed that we were using table salt, Epsom salts, baking soda and vinegar, shaving cream, cornstarch, and water for so many of of their creations. I have links to many of the recipes I use this week and I will post them below. I will also add a link to all of the pictures that we took at camp in addition to some small selection here.
borax crystals
 http://chemistry.about.com/od/crystalsforbeginners/tp/Easy-Crystal-Growing-Recipes.htm --borax crystals on chenille stems

epson salt crystals
 http://www.hometrainingtools.com/quick-crystal-project/a/1687/--epsom salt crystals

http://candy.about.com/od/hardcandyrecipes/r/rock_candy.htm--rock candy-- thin wood sticks in test tubes

making goop or oobleck
snowball fight outside
http://www.playcreateexplore.com/2012/08/summer-snowball-fight-with-fluffy-stuff.html

goop--http://www.exploratorium.edu/science_explorer/ooze.html

clay landform and sand


clay #3 http://chemistry.about.com/od/chemistryactivities/a/modeling_clay_recipes.htm


erupting volcano
solution to launch corks--soda bottle 12oz works well, 4-6 oz vinegar, 1Tbs baking soda wrapped in tissue, cork, plastic wrap

erupting volcano--soda bottle 12oz works well, 4-6 oz vinegar, 1Tbs baking soda, 2-3 drops Dawn detergent, food colors
colored water experiment (jr)  http://wemadethat.blogspot.com/2013/03/water-transfer-experiment.html

Paper casting using white envelopes

snowball fight

space ship from tomato container
Pictures from camps:

imploding a can 
Day 1   Day 2
Day 3 jr
Day 3

AD