Wednesday, July 31, 2013

Mixed media mini-camp bring out creative thread @WB Annex


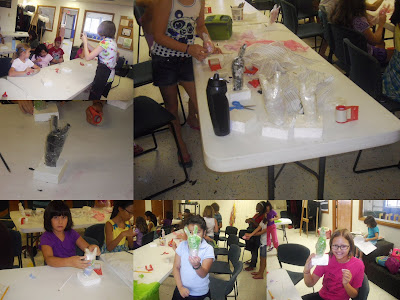
 It was a week for learning new things, combining things and generally playing with lots of materials to create our projects. We started by learning to do tape sculptures using our hand to form a bunny. Sticky fun but they turned out really well--even on the few kids who wrapped the tape so tight I thought we'd have them encased forever.

We moved on to a recycled project using a CD, tiles, brass candle cup inserts and knife handle to make an owl. Our last project was a metal sculpture on a 4x4" canvas. The kids used the metal bit in so many different ways being only limited by time.

Pictures of day 1
 We started the 2nd day learning to do simple weaving on the back of a hotel card with slots cut into it. The campers did not not have difficulty doing the initial wrap and pretty soon everyone had depleted the first piece of yarn and was asking for more. Most added beads or other items they found in my parts box. Quite a few went home with their card and needles to make more.
 We split into groups for this one and still the over whelming smell from nail paint was pretty strong. The campers got a 2" metal disk and painted a layered design on it using the nail enamel. They later added a ribbon to it so it could be hung or worn. This has been a great project for groups except for the smell. It always turns out great.
Our last projects of the day were to teach layering and use of objects to make a background. the campers had to sand the surface first then add string to one in the shape of a curly tree. The other one got lots of paper shapes then random layers of tissue paper, some what nots, a large  layer of tissue applied with decoupage glue, then a bit of a dry and painting using sparkle tempera paints. Wish we would have gone slower and added stuff to this one the next day.
Day 2 pictures


We started the last day of camp with a challenging finale--to create a total design using a variety of papers and the techniques we learned during the last 2 days. They created either a guitar or a hot air balloon as their project adding beads, threads and other items over the paper background. A couple of campers like the look of the overlay of tissue paper and glitter paint and finished theirs in that manner. It was a really great way to finish up.

Our last project was more of a 3D than mixed media per se. I got glass panels from a friend. We drew a pattern for a goldfish or Koi then painted sea weeds on the back of the glass panel. We then flipped it over and painted the fish on the front side complete with shading and color mixing. Everyone got a ribbon to string through the hole to hang it up. Lots of wows on this one as it dawned on them how they were creating depth.

Day 3 pictures
Guitars and hot air balloons

Monday, July 22, 2013

Making fish masks from recycled containers @WBCL

 Masks are always fun to make because they take on a life of their own. I was given a large pile of squarish plastic tubs and thought they would make great fish. We started with a sheet of yellow paper and instructions to make eyes in a variety of ways. I also showed them how to make puffy lips and let them do their fish "their way." It always works. some added streamers for fins, most just worked on the face and had lots of opinions on the shape of things. It used up some of my stash of odd paper pieces but not a lot.
We meet every Wed. at 6pm for a family time creating crafts projects and art work.
Posted by Picasa

Saturday, July 20, 2013

Chopping and slicing and making cinnamon mountains, veggie skeletons and egg critters @WB Annex


 This group is in love with the slice and dice moves. We set up our own slice and dice table with 3 dicers, 3 cutting boards, and a number of small knives. Little did we know that the slice and dice activity would be as popular (or more) than making the food projects. Thanks to neighbors for loaning us crinkle cutters this week. Pickles, cucumber and celery are so much more interesting if the edge is all crinkly. The pictures tell it all although the scrap crust cinnamon mountains were a real hit.

These are supper easy to make and take care of the bread crusts that so many kids want to throw out.
You need about 2 cups of crusts torn up into little pieces, 1/2 apple grates, about 1/3 cup water and cinnamon sugar for on top. Once we combine the first 3 ingredients we divided the dough into piles for each camper who formed them into a volcano shaped pile. The kids then sprinkled the top with a teaspoon or so of cinnamon sugar mix. We baked them about 15 min at 350.  One of the campers went home and fixed this desert for her family.
The group competed to make the best veggie skeleton then voted on each others and awarded most colorful, most variety and most unique. It was fun to see the skeleton families--including pets. Most of the skeletons didn't make it past judging as we are a hungry group. The egg critters were also fun and didn't last long. I got to take a couple home but from the egg monster with a carrot center to the egg under trees with 4 baby eggs to the bunny egg we had fun with our food.  We used a few cookbooks for kids from the library:  The international cookbook for kids, The kids' multicultural cookbook: food around the world, and a couple of mine including Pizza Art.

For all the pictures:
 Food art camp day 2
Food art camp day 3

Tuesday, July 16, 2013

Making pizza, rice salads, and painted cookies at Food art mini-camp @WB Annex

We started the week with a discussion of  kitchen safety and what would make food look better we started by making chef's hats. Of course several of the hats fell over the kids' faces which just made everyone laugh. We quickly whipped out pizza dough from a packet and formed it into themed personal pizzas. The kids put on lots of veggies and lots of cheese. Got to grate their own and even used my revolving grater.  The themes were the beach, a forest and the park.

Our next project was to make a rice and veggie dish to go with our theme. The kids got to cut, chop and disect cucumbers, tomatoes, peppers, zucchini, celery, and onions to decorate the rice. What was called for was more color and they hit my food color to make blue water and greener trees. wow what colorful stuff. They were concerned that the blue rice would taste funny (it does not) We finished off painting sugar cookies with gels made from Karo syrup. The cookies went really fast.  More pictures are on FB at: Food mini-camp day 1

Friday, July 12, 2013

Drawing dragons @WBCL

I was give some heavy Crayola paper with fluorescent markers by a neighbor earlier this year and thought we would use them on this project. Perfect! I had all the kids draw along with me to create their dragon on one side of the paper. Great drawings by all from the wings to nose to tail. Then we colored them in using the markers. The markers develop over time so they are not too bright or glowing in the first few minutes but when they get going -- wow--the design just shines.

Dragons and mythical creatures art mini-camp @WB Annex 2

Finishing off the week with more project and as one mom put it "more magic." When we attempted wire art earlier this summer most kids had a hard time with it but this time we were in the grove.
We did a fairy or elf first using chenille stems, pony beads, a clay bead I made, and wire ribbon for wings and clothes. The guys wanted swords so created them from wood sticks and aluminum tape. Several of the elves were totally dressed in aluminum tape armor by the time they were completed. I saw sword fighting going on and then the creations got to climb aboard the dragons we made next.

Following along with a complex wire project is always a challenge but everyone got a dragon created in the end with wings and many with fire spitting out the front. I found very large chenille stems that were more curly at Oriental trading for this one and used some glittery wire mesh for the wings. Of course the eyes and some of the pompoms just needed hot glue. The kids are in love with it once they use it. The idea was to make them small enough to fit into the eggs but most of them sat on the eggs instead.
We talked a bit about the types of dragons and how Chinese dragons are different from the European ones. We created the dragons from a paper bag and strips of colored card stock joined with brads. They are decorated with all kinds of paper from shred to tissue paper, paper plate pieces to construction paper. some had long tails with streamers on them. We were even able to add bells to them and a chenille stem or two. Our dance was very short as time just ran out but lots of fun anyway. 

Dragons and mythical creature art mini-camp @WB Annex


Dragons was a popular camp session a couple of years ago so we decided to expand it and repeat it this summer. We started the week making a clipboard project from a library book, Funky Junk and went from one medium to another getting dragons, fairies, unicorns, and more created.  

We used small lemonade drink bottles as the base for our paper mache project. The mache was created from envelopes and school glue but was too wet so it got to spend a day in the oven at 225 degrees. It dried out well but the bottles got kind of puffy on the bottoms so to paint them we had to nestle them onto foam sheets. The kids made everything from a penguin to creatures from movies complete with swords.

I was given some red fabric that seemed just the thing to make dragon banners at camp. the kids did not have to draw their own dragons but they picked their colors and techniques to paint them. At the end they could use squeeze paints to outline and highlight some of the areas.
Fimo or sculpy clay is really colorful but was hard for us to work with in the past. I cut lots of dowels into rollers and once we got the clay soft the creations began. They not only made unicorns and dragons but an assortment of items for the fairy gardens the next day.
Using gourds supplied by a friend and lots of "stuff" each camper created a fairy or dragon garden on a base of styrofoam.  We had a number of grassy items from model RR and floral kits, stones, tiles, silk flowers, silver rings, small pieces of wood for signs, our clay mushrooms and pieces, little birds and lots more that I was able to accumulate.

Many more pictures are posted online on FB:
Dragons art camp day 1
Dragons art camp day 2
Dragons art camp day 3

AD