Thursday, December 15, 2011

Painted cookies brings families together @WBCL

In the rush of the shopping season some of the "old-fashioned" kinds of things like decorating cookies have gotten left behind. But not for the kids and their families that came to the library to paint cookies last night. They did not get to make the cookies but the look of delight on faces of young and grown up at the selection made that a small detail.


 I found a recipe for the hard frosting to paint with and used it. The key to getting good color was to use plenty of food coloring so the colors would be vibrant. I stirred with a little plastic spoon but a straw would work. Everyone had their own themes for detailing the cookies and all of them were just perfect. The cookies can be hung at home just like my memories as a kid.
To make the frosting to paint with use the recipe from allrecipes.com/

1 dozen cookies' worth
1 cup confectioners' sugar
2 teaspoons milk
2 teaspoons light corn syrup
1/4 teaspoon almond extract
assorted food coloring
In a small bowl, stir together confectioners' sugar and milk until smooth. Beat in corn syrup and almond extract until icing is smooth and glossy. If icing is too thick, add more corn syrup. Divide into separate bowls, and add food colorings to each to desired intensity. Dip cookies, or paint them with a brush.

Posted by Picasa

Friday, December 9, 2011

Jewelry making turns into gifts for families

Beads of all kinds and sizes just beg to be strung into a necklace, bracelet or be made into a pin for ourselves or someone we know. This class let families with kids of all ages work together to create a great gift or two from the beads people have donated to me. 
We used thin wire, cording, and metallic chenille stems as bases for the projects. I was lucky to find necklace closures to add to the ends of the wires to make a more "professional" way to finish the necklaces and bracelets. Most of our participants also decorated boxes to hold their gifts complete with ribbon bows. As you can see, the kids also made sure they went home with something to wear themselves. Lots of lucky grandmas and aunts out there this year!
Posted by Picasa

Monday, December 5, 2011

Holiday ornament making draws out the families

Everyone seemed to have a great time making ornaments Sunday afternoon. Even though it was cold and rainy outside we were snug and busy painting, gluing and adding glitz to the ornaments. It was hard to tell what was most popular as children and their parents moved from table to table to create reindeer from cork or clothes pins, snowmen from plastic snowflakes and white foam balls, decorate gingerbread houses and trees or paint wooden ornaments and plastic suncatchers. 

Take a look at the slide show:

Friday, November 11, 2011

Pinecone turkeys a hit

What could be more fun than creating a turkey from clay, pinecones and feathers? This is a repeat project that never turns out the same but is always fun to make. We use the homemade clay and this time used a bit of funfoam for the beak, comb and used chenille stems for legs. Although turkey feathers are boring brown we didn't have those on hand so our turkeys are much more colorful. The turkey lower right turned into an owl. I think a lot of tables will have interesting decor for Thanksgiving.
Posted by Picasa

Monday, October 31, 2011

Pumpkin painting @WBCL


It was crisper than we expected but that did not stop the families from turning out for all kinds of activities and the annual pumpkin painting. The library tried something different this year and limited the groups to 20 each hour which was great for the first hour but left a lot of unpainted pumpkins at the end of the day with people unwilling to wait to paint. It was sure less crowded and a lot of fun as you can tell from the pictures.

Friday, October 28, 2011

Twisty paper trees @WBCL

I have tried the paper bag trees before at school and love the look and the adaptability but sometimes they do not stand very well which frustrates the kids. This makes a great 3D project and used up paper that we might throw out otherwise so fits well into the recycled art category too.

 For this group we tried something new and it really worked well. We used the brown wrapping paper instead of bags and folded it a couple of times before cutting it into strips. We also used a sheet of black paper as a background to mount the tree onto when finished.

Everyone seemed to have fun twisting and shaping the limbs then adding the bits of tissue paper for leaves. Some had a few fallen leaves, some had a lot, a couple even put them onto the trunk so we could see they were falling but not down.

Wednesday, October 12, 2011

A flotilla of ships for Columbus Day @WBCL

What is Columbus Day? What better way to discuss a bit of history than to create all 3 of the ships famous for the voyage to the Americas. We used recycled materials to create the ships using ideas I found on-line as a guide. We used 3 cardboard egg cups, S-shaped styrofoam peanuts, a bit of home made clay, brown paper bags, and BBQ skewers.


The sample was painted but it seemed a better idea to wrap brown paper around the cup to create the "wood" then thread the styrofoam peanuts onto the wood masts and settle them into clay in the base of the cups. Most of the kids added flags to the tops of the masts. One of the kids decided that it was best to keep the 3 boats together by never seperating the cups. Guess they won't get lost that way!
Posted by Picasa

Wednesday, September 28, 2011

Corn husk scarecrows @WBCL

Using what is at hand sometimes creates a much better project than I expect and this week's scarecrow was no disappointment to this theory. I had corn husks and small cone coffee filters in the basket to use. We tried something new and used twist ties to secure the ends of the arms and legs and even the neck with great results at all ages. The husks formed the arms and body while the coffee filter made a great surface to draw a face and stuff with a bit of paper for form. we tied them over the top of the body with yarn then added paper shred for "hair" and a straw hat. This scarecrow probably won't scare any crows but they were really cute.
Posted by Picasa

Friday, September 23, 2011

Painting fall leaves @WBCL

Much more colorful than nature is how our leaf painting project evolved. We used wooden leaf shapes to create our leaves then a pallete of colors to bring on the fall flavor. We tried to keep the leaves seperated a bit so the colors would not run but not everyone is bothered by colors running together. I am not sure what trees our leaves might come from but they are far more colorful than we are seeing locally.
Posted by Picasa

Friday, September 16, 2011

paper hats for Diez & Seis @ WBCL

What fun! We used heavy colored paper for these hats instead of brown crafts paper as we had it on the shelf from a donation. I cut the squares about 24" on a side and handed them out to everyone. We used a disposable bowl as a form instead of the kids' heads so they could make the crown of the hat. Once the paper is crimped around the bowl just add masking tape or scotch tape to keep it in shape.


We then used markers and crayons to decorate the hats and tried them on. They were offered yarn but it just didn't appeal tonight. Most of them altered the outer edge of the hats--sometimes smaller or fringed. 
Posted by Picasa

Friday, September 2, 2011

Shell creations @WBCL arts & crafts

I love to do an end of the summer project using shells and it is always popular and really creative. This time the group was a bit younger than before but rose to the challenge. I let the group know up front that the glue gun was a parent operated devise for the kids under 9 ( almost the whole group) but the kids and parents should work together to create creatures or frames decorated with shells.


We recieved some 4x6" mats in a donation and put them out along with some red/yellow 5x5" ones left from another project. Almost everyone chose to decorate the frames and really got into it. They did not hesitate to create creatures on their frames thought adding tiny shells and eyes as needed. This is going to be on many 'fridge doors this week.
Posted by Picasa

Thursday, August 25, 2011

Using stamps to creat art @WBCL

Initially I planned to use fruit to make prints in this session. But on rethinking the cost and waste, and the nice supply I had of foam stamps change was in order. Each table was set up with egg carton with 5 colors of tempera paint and a generous handful of small and medium stamps, paint brushes and wet rags.
We used heavy paper and off they went. We painted the stamps using a small brush as it make the stamping with paint neater, especially for younger kids. The quiet in the room as everyone concentrated on the work was notable. Great results too.
Posted by Picasa

Thursday, August 18, 2011

Making mache bowls @ WBCL

This was messy, it was gooey and they bowls turned out well for everyone. In making mache a number of times over the last year, I think we finally have the formula down. I shredded cups of white packing paper and used the blender to pulp it, then drained it and mixed the pulp with a few cups of commercial mache mix and 2 bottles of school glue. It was still a little wetter than we wanted but any dryer and it was hard to work with.


We first put plastic wrap over a small plastic container then damped some tissue paper strips and covered them with the colored mache mix. I gave every table a bowl of colored paper shred to use at the end to decorate the bowl on the outside. We used nylon netting to work with the final shapping so the mache did not stick to everyone's hands. It worked really well. Every project went home with their net so if any slippage occured on the way home it could easily be reshaped. In a few days they will be dry and can be lifted off the plastic container and used for dry items.
Posted by Picasa

Saturday, August 13, 2011

Train shirts & face painting @ circus art camp day 3

Historically trains played a large roll in the life of a circus so I thought it might be fun to paint one on a t-shirt as part of this week's camp. Initially I planned to have everyone stamp on the engine and cars then paint in animals but that seemed a little complicated for this large group. Instead I put on a pattern of the engine and 2 cars then gave them the paints to decorate things as they wanted. The older group used fabric paints and a special glitter for wet paint. They were a little concerned about the lack of wheels on the cars. Quite a few requested their wheels be drawn on as they were not sure they could do 6 circles of the same size. The younger kids just added the wheels and said " they don't have to be perfect, it is my art." Great attitude! The younger group got to use the paint markers with great results. They are easy to draw with so many embellishments appeared. The crayola ones are far superior to the other brand we tried out. We also used small tubes of quick drying fabric paint from Michaels. Again not as good as the so soft brand but many had glitter and got the job done. The kids were pleased.


Not many of the group had ever used face paints or designed their own faces. we first had them sketch out what they wanted on thier face then issued the paints, mirrors, q-tips and set them loose on each other. At first they were a little timid but all of a sudden the faces took shape. they learned how to put the paint on, how to take it off, and a little about painting safety. The results were pretty good. Take a look:


We ended the day making and decorating popcorn boxes which we then filled with popcorn and fresh roasted peanuts. What a fun way to end the day!
Posted by Picasa

Animals & performers @ Circus on Stage art camp day 2

We started today with a group project using donated and recyclable materials --paper tubes, cardboard boxes, gift wrap, and lots of streamers. We created the cages for the animals in the circus to be made later in the day. I cut large rectangular boxes about 4" high for the tops and bottoms and got gift wrap tubes for the uprights. The kids glued them into the corners then made bars for the cages from streamers and decorated the boxes with the paper. A sign and they were done. Now who gets to take them home?


Our second project was to take coffee cans and a variety of papers, yarns and other bits and create the animals for the cages. We created lions,  tigers, elephants, bears, and horses. I heard the horses were getting a bit long in the face (piggish) at one point but in the end all the animals turned out great and were exhibited briefly in their cages.

I was afraid our last project would be a bit challenging but everyone did great creating wire sculptures of the performers and other circus items for their big top. Kathryn lead this one and I think her examples were the biggest creations of all. 


I will have slide shows of our entire day ready soon to share.

Clowns and balloons at Circus on Stage art camp day 1

Did we save the best for last? some of the kids thought so. The clown was a challenging project but everyone went home with one and the oohs and aahs when the clown was assembled were great to hear. We used a 2 1/2" foam ball, a cardboard cone form from OTC, ribbons, fabric, pom poms, wiggle eyes, yarn, and straw hats. First we created the head and put it onto a dowel then assembled and decorated the cone and added a body complete with bright fun foam mits. I am posting step by step directions on the patterns page.


Balloon animals and hats were our second activity of the day and Keighla led all the kids through creating great projects. I blew the balloons up in advance which was a bad thing/ good thing. The balloons lost a bit of air which made them much easier to work with for the younger kids but the creatures were not as firm. We did blow up plenty of the balloons at camp to do a few more.
Our last project was to create a poster about the circus or to draw and color a clown car. There is something special about giving kids large sheets of paper to use and seeing them go to work on the project. We don't seem to have any shy kids using only 1" of the paper. I think we even threw in a few bookmarks for some of the kids that were too fast for the group. Going home tired with lots of stuff to brag on.Posted by Picasa

Saturday, August 6, 2011

Sunbursts, flying fish, Calder sculptures, and Picasso guitars @ 3D art camp day 3

Sometimes a project is just meant to be! This one looked attractive and had the potential for creativity so I scheduled it. What a great plan. We made the watercolor pieces earlier in the week then assembled our collage/paper sculpture of a sunburst adding paper curls and the results were definitely beyond what I expected. The kids liked doing the project and taught each other to curl paper and helped hold components so they would adhere to the paper.


We moved on to a sculpture in a can AKA Calder that is a lot of fun to do. We used tuna/cat food cans as a base with a styrofoam insert and clay over the top to seal it. We then created the sculpture from crazy straws, chenille stems, pompoms, beads and foam core cutouts.


Another project to complete was our paper lantern flying fish. This one kind of got away from us a little as we worked out the best way for everyone to create the fins and faces but in the end everyone had a fish and a huge smile. It was not as important to the kids that the fins be stiff as it was to the designer. It was a lot more hassle to attach the tissue to the thicker paper than to have fins that were a bit more loose. The loosest tail fin made of 4 pieces of tissue and no base paper actually looked wonderful and attached easily to the frame.


Our last project was a collage based on one of Picasso's guitar collages. We reviewed several that are one display at various museums and the discussion was centered mostly on the lack of color in them. Ours certainly did not lack color. We used a cardboard base and covered it with geometic shapes cut from scrapbook paper. we then added a foamcore chair and covered it with paper and ribbon. Lastly we added a blue denim guitar and embellished it with metallic thread, wire, buttons and other items. They turned out great.!
Posted by Picasa

Friday, August 5, 2011

Watercolors and flying fish @ 3D art camp day 2

Doing water colors with spray bottles is really a lot more fun but the bottles present their own dilema: what to spray, your paper or your table mate? We used 4 sections of watercolor paper to create the basis for our sunburst collage. The campers wrote something about sunshine on the long one then painted all of them with a combination of yellow, orange and red and set them aside to dry. It was fun to see what happened when the painted areas were resprayed and how the paint ran as the papers were tipped.


The second project was our flying fish. We used a paper lantern as a base and made fins and all the details on the fish from tissue paper and paper crimp. Some are done but most still need a few finishing touches.
Posted by Picasa

Butterflies & paper mache at 3D art camp day 1

We started this week off with 2 butterfly projects that really turned out well. We had a set of foam butterflies in a kit, a little hard to assemble but in the end a pretty good project. The 2 part butterflies gave us a bit more room to get creative. Students were encouraged to use the books on butterflies as a resource and create the butterflies by drawing, coloring and/or collaging them. Lots of great projects!


Our second project was to make a paper mache bowl from a berry box. This is by far the messiest mache I have ever worked with. We colored it in the mix and had them pat it onto the boxes so they could dry to be decorated on Friday. Lots of ewe..yuck--was heard.


The last project was one of optics using domed glass beads and stickers to examine which color and size magnifies more and if using a spacer alters the image more. They also got to have an old ribbon marble to examine.
Posted by Picasa

Thursday, August 4, 2011

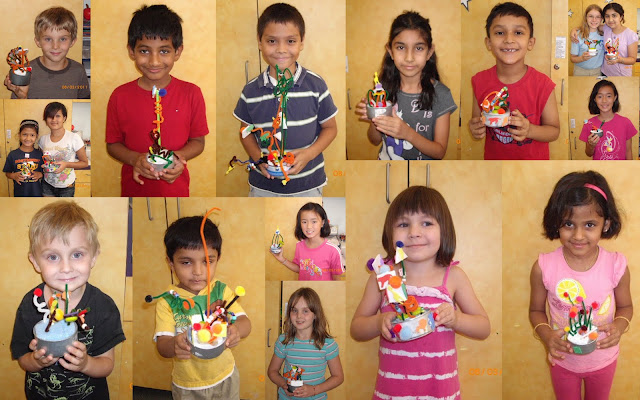
Making a sculpture in a can @WBCL

They really used their imaginations on this one! This project is a take off on one of the Calder sculptures I worked with earlier in the summer. Each participant was given a tuna/cat food can with styrofoam inserted into it, an array of chenille stems, fun foam shapes, pom poms, beads and foam core shapes. It was interesting to see what they created and hear their descriptions. Some were mobile and one was very large--needed a straw to keep the shape of it.


Posted by Picasa

Saturday, July 30, 2011

Wild& Wacky Science art camp II day 3

What a wild day! We had a guest (my husband George) with tools, lots of old electronics, lots of recyclable bottles and other items and kids. What a combination. We have been collecting items for months for this project so the kids could take things apart and see what was inside of them and what made them work then create a roboto with the parts they generated. We are pretty big on safety when we do this and only had need of 2 bandaids as the glove was on the wrong hand. Thanks to Kristin, the kids librarian for lending us the goggles and safety glasses. Kids got the chance to see how some of the tools worked too as most had not seen or used C-clamps or pry bars. 
We finished off our day making "cooked" puffy paint art. We made our own self-rising mix and added colors with food coloring then painted cardboard squares and popped them into the microwave. Very interesting to watch them puff up.  I found this on an internet search. 


Recipe: 
Place into little cups: 1  teaspoon flour, ½  teaspoon salt, ¼ teaspoon baking powder
 Add 1-2 drops tempra paint or  food coloring to each cup and then add 1 1/2  teaspoons water to make a nice smooth paste- like pb. Dab onto surface thickly or spread with Q-tips, wood sticks or stiff paint brushes. Put into microwave for 30 seconds. 


Take a longer look at our day:

Friday, July 29, 2011

Wild&Wacky Science art camp day 2

We started the day using homemade clay and corks to create bugs with chenille stem legs and wings. Some of the kids decided that the corks did not fit with their plans and went on to create bugs of every size and shape. we limited the colors of clay to about 6 but that did not seem to limit the kids at all.


Next we did another splitting color project. We used washable markers and permanent markers on coffee filters to create designs. we then spritzed the filters with water to see which colors spread. The kids then used a dropper and alcohol to see if that would make the other colors spread. A bit of spritzing each other as well but water is probably OK. Our second project was a bit of a flop from an art standpoint--pounded flower prints. The flowers are a bit dry this time of year but the pounding part was a real hit. Some of the group decided that if they stamped on their project that it would squash more of the color from the petals and leaves.
Our final project of the day was a stamping project with a variety of fruits and vegetables and a paint called heavenly hues that gives a bit of a softer effect even on the fabric. They turned out pretty well and the older kids got really creative in how they used them.
Join us for a closer look at our whole day:

Wild&Wacky Science art camp day 1

We kicked off the week with the messiest project yet...our very colorful lava lamps and glitter globes. The group got to figure out which liquid floated on which and how salt and alka seltzer altered the oil/water mix in the lava lamps. They also got to see what different mixing techniques did to the glitter globes. I am so grateful for all the donated newspapers that made cleanup a snap!
We then made and decorated periscopes from CDs and long white boxes. The group had to assemble the mirror sections and install them so they were at the right angle and parallel with each other. One of the group discovered that placing 2 of the periscopes together works pretty well too.
Our last project was one of splitting light and investigating what materials would do this. We used prisms, various glass jewelery, mirrors, an acrylic award, CDs, and water prisms made from a glass dish and a mirror. The kids discovered they could bounce the rainbows all over the room and direct them where they wanted to.
Take a look at our day below:

AD